Hi

Hi, Thanks for dropping by.

My name is Eileen but to friends in the card making world I'm known as 'ikki'. (which is pronounced I-KEY) From where or how this came about I'm not sure - it just got shorten from my original craft name of Ikemo by various friends along my crafting way! I started crafting whilst recouperating from an accident, and from my first attempts with peeloffs and paint - I was hooked! Now my passion is my BUG! and now BEADING!

In the Cupboard you will find ideas, news, tips and techniques to help you get more from this fab little machine. So come in - join the fun and Cuttle with me!


Showing posts with label Nestabilities. Show all posts

Monday, 14 May 2012

Wedding Day

Hi, earlier this year I was commissioned to design Wedding Invitations and Friday was the big day, so out came my Nesties and my thinking head......


The colour palette coordinated with the wedding invites which made my project much easier as crafting and motivation is still a problem! AND, this new blogger layout is defo not helping! 

I have not been as idle as it would seem - I have also this week designed a new blog heading with Craft Artist - what do you think?


Monday, 23 January 2012

Shaped Cards with Nestabilities Grand Labels 4

Hi, at last I hear you say - where have you been?  Well I do have to say sorry for being away for soooooo long - a number of events have been going on in my life - illness, reaction to medicines, a wedding commission, DT work, Christmas, New Year and to top it all a family funeral.    I have had to make a few changes and I will tell you about some of them over the week, but for now I would like to show you the new stamps that have been released this week by Chocolate Baroque.  Florals!  Always a favourite and so useful for so many occasions.  The DT have produced some stunning artwork and you will be able to view thier samples over the next couple of weeks.  You will find the link on my sidebar and I really do hope you pop over there for some fab inspirational ideas. 
 Rose Tree
Honeysuckle
Wisteria

I have been working with the stamps and this is one of my designs......


I have used stamps from the Wisteria and Rose plates.  I love the way the butterfly seems to be hovering and the shape of the flower lends itself to a vertical sentiment. The Grand Nestabilities Labels 4 are great for making shaped cards.  If this is a new technique for you check out this link from way back in March 2009!


To make this card you would need:

Cardstock: A4 white texture
Decorative paper: CB Essence of Italy
Nestabilities: Grand labels 4 (3# and 4#)
Mega rectangle (3#)
CB Stamps: Wisteria Lane, Rose Tree
CB Sentiment: Birthday words
Inkpads : DI dusty concord
Clear embossing powder
Ribbon, foam pads

Thank you all for your support whilst I've been away - I'm hoping to get back to a more structured blogging and catching up with visits to your blogs.   Although we are now way into January and it's a little late to wish you a NHY, but I'm going to say it anyway - I hope you are all well and that 2012 will be a good, health and prosperous year for you.

Back soon.

Thursday, 9 June 2011

70th birthday

I was asked to make a card for a special 70th birthday and this is what I came up with.....


  On cream hammer card, I stamped in Versamark and heat embossed with a silver pearl powder.  The leaf dies are Marianne, the butterfly is from NS and the sentiment was PC generated and then cut out with a Nestie Label 4. 

I like to use a heavyweight textured card and have found that to add more texture and interest I can use stamps - Glenda's in particular are good because of their large swirly nature which can be twisted this way and that and end up looking like you've used a number of different ones instead of one!  

I thought you would like to see the insert of the card.  The verse is lovely and really useful - feel free to use it.

Sorry I have been such a bad blogger - life, pc problems and internet connections are causing me somewhat of a headache!

Monday, 11 April 2011

Nestabilities Pendant and Border dies - Chocolate Baroque Doodle Stamps

Monday does seem to come round quicklythese days!  Today for my tutorial I thought I would show you another of my DT cards, this time using one of the new Doodle stamps......
Materials used:
A4 sage green card, extra sage green, dark green and white card, decorative paper
Nestabilies Pendant and Border die: Spades
Nestabilies: Classic Squares, and Oval
CB: Doodle Rose
Creative Expression Mask : Ivy
Distress inks, Marvy la Plume pens, ribbon

Method:  Centre score and fold A4  sage green card.
With large square die emboss onto the card using the sandwich I gave you a couple of weeks ago.  - you will the recipe on my embossing page.   Or you could use a magnetic mat - you will find info and examples on how to do this in the label section on my sidebar under Magnetic mats.
Cut the second smaller coloured square and emboss with a mask or folder.
Cut and emboss the Pendant die from decorative paper.
Cut and emboss the border from the same card as the base card. (I left the cutouts in place and secured with tape).
Cut an oval from white card - colour the stamp with Marvy la Plume pens and then stamp - emboss with the mask and colour with DI's.
Assemble, threading the ribbon through the pendant and fix on the back of the square.

Hope you're still with me this take some explaining!   And,  that you are tempted to try the embossing - yet another way of using your dies -  and all your dies can be used this way!  It may sound difficult but it's really easy - trust me I'm a Cuttlebug crafter (lol).

Tuesday, 8 March 2011

Less is More Challenge Week 5

At last a finished card for the LIM challenge for a pastel card.....

White, white and lavender.
  Lavender is one of my favourite shrubs in the garden.
The dies : Marianne Designs and Nestie Grand square
The stamps : from Sheena Douglas, and I'm ashamed to say both very little used!
Another challenging challenge from LIM - well done Chrissie and Mandi - you're making us think and think again about this white spaces!

Monday, 28 February 2011

Less is more challenge - Week 4 - Squares

I have just had a lovely, but very busy three days with my daughter and two granddaughters.  Caitlin and Megan just love getting their hands on my crafting stamps and inks, so no crafting for me!  Hence, a little later than usual for the LIM challenge which this week asks for 3 squares.    Now squares are a fav of mine, but just what to do with them????  Looking for something a bit different I decided to do this.....


I've used a technique called masking to create an illusion of depth and inked straight onto my card. 
 
First fold a sheet of A4 copypaper into 4, then cut with a Nestie Square size 3 (l being the smallest) to make a template.
   
You can play with the cutout shapes to decide on the best pattern

Leave the first cutout in place

Cover with the template and slide the sticky edge of a post-it under each side lining up to the square

When you remove the template you have your square ready to colour.  I used distress inks starting with dark at the bottom and working lighter.

When the first square is completed, cover with one of the square cutouts and repeat the process to complete squares 2 and 3.

    
 I used one of the stamps from the Elusive Image theme plate called Essennce of Nature (UA4SP0339.
By varing the shades of ink you can see all three squares -
masking the ikki way - easy, effective, and perhaps worth a try?
Later today I will show you some other examples of this technique.


Monday, 13 December 2010

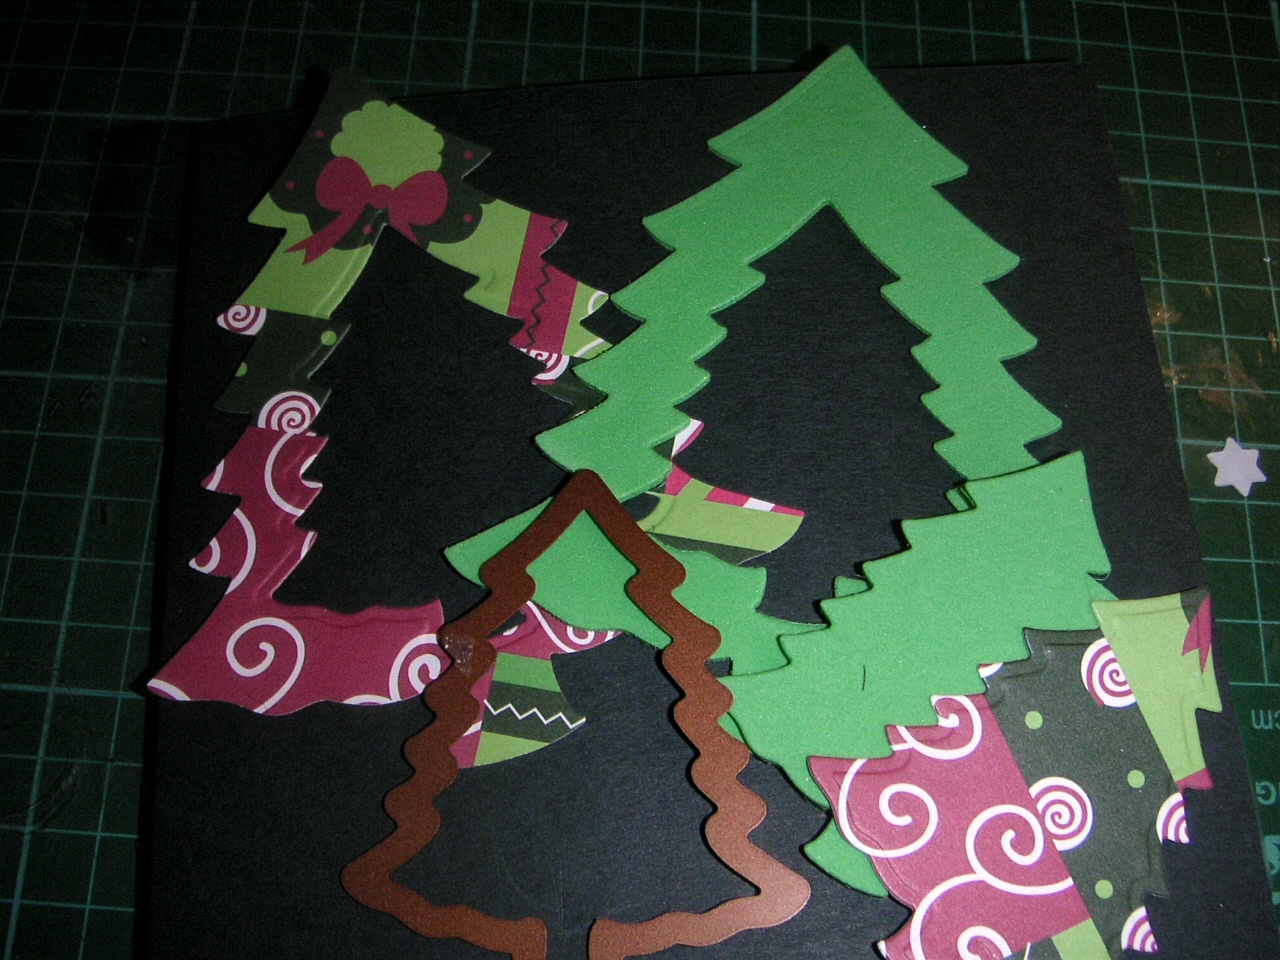
Nestabilities - Tree Shaker Card

Today I have used my last years Nestie Christmas Tree dies to make a shaker card.  The design has changed slightly this year - it's more rounded, but it would  do the same job.

You need:
Card 6" x 6"
Nestabilities: Tree die ( largest and the medium )
Acetate
Fun foam
2 Decorative papers
Decoupage strip foam tape
Small shapes

Cut 4 of the largest tree (2 decorative paper, 1 acetate, 1 fun foam)

With the medium die, cut out the centre from 1 of the decorative papers and Foam.

With double sided tape add acetate to the DP.
  then fix the fun foam to the acetate.
Add strip of decoupage foam tape to back of the fun foam.
Add your shapes in the space created.
Add the last piece of DP to cover the space.

When added to your card......


I think my grandaughter will love this!
You could also use this method to make other shapes. My Dahlia  flower would look good!


Monday, 6 December 2010

Elusive Images Stamps and Nestabilities - Create-a-flake

Elusive Images recently released their Family Christmas theme stamps. The DT had the opportunity to work with these stamps and you now can view their artwork in the gallery at EI. and Graphicus If you follow the Christmas link it will take you to lots of ideas that will inspire you in your crafting.  Also, you will now find projects in the gallery and this is why today instead of my usual tutorial  if you follow the above links you will find instructions on how to make this card ...... 
 A robin, holly and snowflakes....this was one of those cards that just made itself!  You can well image how chuffed I was to find my work on show in both the EI and Graphicus galleries. 

Thanks for dropping by, hope you are well and keeping warm in this cold spell.  

Wednesday, 24 November 2010

Nestabilities - Squares, Snowflakes and Crfts 2 U folder

My tutorial today is based on Nestie Squares and finding a different look.

To make this card you will need:
A4 Cardstock: Cream Hammer
Decorative paper
Nestabilities: 2 large classic squares (size 4 & 5)
                    2 Create a Snowflake dies

Crafts 2 U: Snowflake embossing folder
Gems, ribbon

Base Card:  cut a 6" strip from the A4 cardstock and centre crease.  Place the embossing folder to the centre crease and emboss.  With scoreboard create two lines to finish the pattern.  I have debossed the folder so that the inside of the card is more interesting.

Place the smalliest snowflake die in centre of the plain panel (low tack tape will help hold it in place) and cut out.  Reposition and make two further cuts. Save the cutouts.
 
Cut a strip of DP and add to the inside of your card.


The embellishment:
Cut l square from the largest die in a matching cardstock to your decorative paper.
Cut l Cream square from the smaller - you can cut this from the strip left over from making the base card. 
Cut another of the small squares from the decorative paper used on the inside of the card. 

From the cream square - cut out the snowflake and add the decorative paper behind, then layer on coloured cardstock....

You will see I have used one of the cutouts from the base card and a red gem in the centre of the snowflake.
With a red gem added to the centre of the small snowflake cutouts your card will look like this.....   


As I said yesterday, an easie peasie card, but classy.  AND, a great way of using those leftover bits of decorative paper that you just cannot bring yourself to throw away!

Hope you like this one.   If you use the design and blog it, I would apprecaited you linking back to the cupboard - I started the Cuttlebug Cupboard to share my experience and knowledge with you - please help me to share it with others by spread the word.
                                                                           

Monday, 15 November 2010

Spellbinders Octagon Nestabilities

I'm beginning to get my head round the fact that Christmas is not that far away and I need to start making a few cards.  I had this idea for a quick card to get me going......

I cut  2 dark green octagons from the largest scallop die and a smaller white plain octagon.   On one of the green scallops, I ramdomly stamped a few swirls and snowflakes in silver, covered with clear embossing powder the heated. 

On the other piece of dark green ( the back ) I did this....
made a line and folded.  Now the two pieces can be joined with a strong glue.

Next I embossed the white shape with the winter scene folder, and embossed the edge with an embossing pen instead of putting through the Bug again.  With  a touch of distress ink in bundle sage round the edge and a sentiment stamped in the same shade, all that was needed was  a bit of  glitter, a ribbon, a star, and a few foam pads.


The card stands up well and is certainly a quick make.
Thanks for dropping by, 

Sunday, 3 October 2010

Artylicious - Nestabilities - Marianne Creatables

Printing my own paper background is a new venture for me, but since I now have the Artylicious CD : Essence of Nature, today was playtime

This CD has a beautiful collection of designs,   this one called Windsong....
The butterfly is one of the Marianne Design Creatables cut in a patterned vellum and a patterned paper.


and I love the inserts you can print - althougth I might have got a bit carried away with inking!

I finished my card with a Nestabilies small plain and scalloped oval with a PC generated sentiment. With a few added swirls and a quick inking round the edge, who would think that this was just white copy paper.
The font is:  Amaze - size  18
I've received a number of queries about  fonts and printing sentiments and this is something I'm working on. 

Hope you're having a good Sunday, here in North Staffs the rain has stopped AT LAST! It's defo been one of those days when you can craft and forget about those gardening jobs waiting out there.  All in all it's been a good weekend, Dave's health is much improved - his body seems to be fighting the infection now and the DN's have been wonderfully helpful calling in daily to do his dressing.   I'm crossing my fingers and toes that the coming week be even better!  Thanks for dropping by.


Tuesday, 21 September 2010

Nestabilitie Squares and Scoreboard - Fanned lines

Hi, Dave has not been well since late of Sunday evening, to the extent that he came very close yesterday to being re-admitted to hospital. Thankfully, the situation improved and now we are just taking a day at a time and hoping that the worst is over.

Since he is in bed resting and I needed to unwind, I thought I'd pop back to show you this "Just to say" card  I made recently:  a card for any occasion....

Materials used:  6" x 4" white hammer card
 Image:    Inkadinkado Butterflies and Birds - triple embossed
Nestabilities: Small Squares
Scoreboard: Eaziscore

To achieve this fanned line effect - use the 2 lines as shown.  Do the first line corner to corner, then keeping the bottom corner on the first grove line, move the card to the second line and score again, and so on until you have your desired lines one way, then reverse to complete the design. 

A simple but effective card that you could use for any occasion - today, if I were to write inside it would say "A Big Thank You to you all" for your positive and caring messages. 

Monday, 13 September 2010

Elusive Images and Halloween Stamps

Halloween!  Time for some fun crafting! 

I have to say that I have never made any Halloween cards before, but when presented with the stamps from Elusive Images celebrating this time of year, I was hooked!  What fun - soooo creative - they allow your imagination to soar with the bats, grow with the  pumpkins, candles light your way through the cobwebs to the spooky houses and much more..... you can check out the designs available from this Elusive Images link.

The Design Team has been busy making cards and today we have a blog hop for you.  Why not join us and see our work and on the way you may find some candy ?  Feeling interested; feeling lucky - pop over to the Elusive Team Blog (link on my side bar) you will see all the DT blogs listed for easy assess.

This is the card that I made for the Blog Hop - it's not my spookiest, but I thought this would look good in the Cupboard as although it's a halloween theme, the layout is adaptable to other occasions and the techniques useful to you.

Materials used:
A4 Black linen and Bronze pearlised cardstock
Stamps: Elusive Images
Nestabilities: Squares Classic Large and Big Scalloped Large
Marianne Creatables : Swirls
Inkpads: Black, Clear Perfect Medium
Bronze Embossing Powder
Glue
Scoreboard

Method:
Fold A4 card in half to make a landscape card - emboss 2 score lines along the top edge

Die cut:  2 Black  and 2 Bronze squares  (I used the 2"die)
Emboss the edges with an embossing pen  or tan mat.  ( I like this finished, but it is not necessary )

Make a frame from the 2 Bronze squares using a scalloped die - save the cut-outs
Make the same  frame from 1 on the Black squares - save the cut-out

Stamp the cut-outs black on bronze/bronze on black using clear Perfect Medium inkpad, cover with embossing powder and heat.

Fit the cut-outs into the appropriate squares.  Decide where you would like to position the squares, and add another 2 scores lines underneath.

On a rectangle piece of card, stamp the sentiment with clear Perfect Medium inkpad, over with embossing powder and heat. 
On the edges of the rectangle - with a prit stick glue (or similiar)  run round the edges in a thick  irregular pattern, cover with brozne embossing powder and heat. 

Die cut swirls from the Bronze card and assemble on card with the sentiment tag. 

Hope you have a go a this, it sounds lengthy when reading the instructions, but it's a design that all can use whether you are a beginner or an advance crafter.  If you don't have the dies - you could use a punch.  I'd love to see your work,  if you leave me a comment I'll come over and visit. 

NOW, my Design Teamies have some great cards to show you and I wonder where that candy will be????? 
To be in with a chance to win, here's what you will need to do:
1. Become a follower of The Elusive Images Design Team Blog and all the DTmember blogs
2. Leave a comment on my blog and all the teamies blogs.

The winners will be chosen by Random Org at the close of the Blog Hop on Friday September 17th and the winner will be announced after 5.00 p.m.

Come and enjoy some ghouly fun with us! 
          

Thursday, 9 September 2010

Oval Nestabilities - Information and Sizes

OVALS

Ovals are a little different than circles. For a start there are two sets of ovals:

Classic and Petite.

They not only have a different amount of scallops, they are also different in shape. The Petite shape with 37 edges is more oval shaped than the Classic that has 22 edges. You could describe them as the Classic Scallop being a rounded oval and the Petite being a longer narrower oval.

The Largest die in the Classic Ovals measures approx. 4" x 3.1/l6"
The Largest die in the Petite Ovals measures approx. 4.75" x 3.75"

Therefore, you need the right Standard Oval to fit the right Scallop Oval

Standard Classic Oval Large (S4 -110)
co-ordinates with Classis Oval Scallop Large (S4 -111)

Standard Classic Oval Small (S4-112)
co-ordinates with Classic Oval Scallop Small (S4-113)

Standard Petite Oval Large (S4-138)
co-ordinates with Petite Oval Scallop Large (S4-139)

Standard Petite Oval Small (S4-140)
co-ordinates with Petite Oval Scallop Small (S4-141)

------------

Deckled Edge Classic Oval - S4-259

A Nestabilities® set of five Ovals, all with edges resembling torn paper. The Deckled Edge Classic Ovals LG coordinate with the S4-110 Classic Ovals LG and S4-112 Classic Ovals SM for stacking and layering.
The difference between die template sizes within a Nestabilities set is ½", which becomes a ¼" border when layering. The difference between LG and SM Nestabilities sets is ¼".

Approximate Die Template Sizes:
1: 1⅛ x ¾"
2: 1¾ x 1¼"
3: 2⅜ x 1¾"
4: 3⅛ x 2⅜"
5: 3¾ x 2⅞
-------------------


Big Scalloped Ovals Large S4-251

This set of 5 Nestabilities® die templates features scalloped cutting and embossing edges in an Oval shape. Big Scalloped Ovals LG have 10 half circle curves along the outer edge of the Oval shape. Big Scalloped Ovals LG will bring a soft and delicate look to your oval art.


Big Scalloped Ovals LG stack and layer with the S4-112 Classic Ovals LG and S4-252 Big Scalloped Ovals SM die template sets.

The difference between die template sizes within a Nestabilities set is ½", which becomes a ¼" border when layering. The difference between LG and SM Nestabilities sets is ¼". Combining both the LG and SM sets of Nestabilities will allow for ⅛" borders when layering.

Approximate Die Template Sizes:
1: 1⅛ x ¾"
2: 1¾ x 1⅜"
3: 2½ x 1⅞"
4: 3¼ x 2½"
5: 4 x 3"
-------------

Big Scalloped Ovals Small - S4-252

This set of 5 Nestabilities® die templates features scalloped cutting and embossing edges in an Oval shape. Big Scalloped Ovals SM have 10 half circle curves along the outer edge of the Oval shape. Big Scalloped Ovals SM will bring a soft and delicate look to your oval art.

Big Scalloped Ovals SM stack and layer with the S4-114 Classic Ovals SM and S4-251 big Scalloped Ovals LG die template sets.
The difference between die template sizes within a Nestabilities set is ½", which becomes a ¼" border when layering. The difference between LG and SM Nestabilities sets is ¼". Combining both the LG and
SM sets of Nestabilities will allow for ⅛" borders when layering.
Approximate Die Template Sizes:
1: ¾ x ½"
2: 1½ x 1⅛"
3: 2⅛ x 1⅝"
4: 2¾ x 2⅛"
5: 3⅝ x 2⅝"
--------------------------

Beaded Ovals - S4-294

Designed to coordinate with Classic Ovals, these Decorative Elements Nestabilities® feature a scalloped edge filled with an embossed circle, or bead. The edge detail has even spaced embossed beads all the way around each die template in the four piece set. Beaded Ovals nest for making elegant frames. Cut/emboss and stencil onto the oval center or layer with Classic Ovals for versatility and elegance.

Approximate Die Template Sizes:
1: ⅞ x ¾"
2: 1⅜ X 1¾"
3: 2¼ x 2⅞"
4: 3⅜ x 4¼
------------------

Crown Ovals - S4-303

Coordinating with Classic Ovals, these Decorative Elements Nestabilities® feature embossed tip crown points that encircle each embossed circle to give a regal look. This four piece set nests for elegant frames, or can be used individually, with stamped images or embellishments in the center oval.


Approximate Die Template Sizes:
1: ¾ x ⅞"
2: 1½ x 1¾"
3: 2½ x 3⅛"
4: 4 x 4¾"
-----------------

Grand Ovals - LF-110

This set of Grand Ovals coordinates with the original Nestabilities® S4-110 Classic Ovals LG, and stack and layer with LF-111 Grand Scalloped Ovals.


Grand Nestabilities are designed for use in the Grand Calibur™ Die Cutting System. Spellbinders™ Grand Nestabilities cut, emboss and stencil perfect shapes that mix and match with original Nestabilities sizes. Larger shapes offer endless possibilities for scrapbooking, school projects, mini albums and more!

The difference between die template sizes within a Nestabilities set is ½”, which becomes a ¼” border when layering. The Grand Nestabilities increase in size from the original set, and maintain the same increments between die templates.

Estimated Shipping Date: October 2010
Approximate Die Template Sizes:
1: 3¼ x 4¼"
2: 3¾ x 5"
3: 4¼ x 5⅝"
4: 4¾ x 5⅞"
5: 5¼ x 6⅞"
6: 5¾ x 7½"
----------------------

Grand Scalloped Ovals - LF-111

This set of Grand Scalloped Ovals coordinates with the original Nestabilities® S4-111 Classic Scalloped Ovals, and stack and layer with LF-110 Grand Ovals.


Grand Nestabilities are designed for use in the Grand Calibur™ Die Cutting System. With Spellbinders Grand Nestabilities cut, emboss and stencil perfect shapes that mix and match with regular Nestabilities. Larger shapes offer endless possibilities for scrapbooking, school projects, mini albums and more!

The difference between die template sizes within a Nestabilities set is ½”, which becomes a ¼” border when layering. The Grand Nestabilities increase in size from the original set, and maintain the same increments between die templates.

Estimated Shipping Date: October 2010

Approximate Die Template Sizes:
1: 3⅝"
2: 4¼ x 5⅜"
3: 4¾ x 6⅛"
4: 5⅞ x 7½"
5: 5¼ x 6¾"
6: 6½ x 8¼"
--------------------------

The numbers of the sets are from the Spellbinder web site.

If you had both sets of Large and Small there would be 1/8" difference between the dies if the sets were layered inside each other.

If only one set the different between the dies would be 1/4"