Hi

Hi, Thanks for dropping by.

My name is Eileen but to friends in the card making world I'm known as 'ikki'. (which is pronounced I-KEY) From where or how this came about I'm not sure - it just got shorten from my original craft name of Ikemo by various friends along my crafting way! I started crafting whilst recouperating from an accident, and from my first attempts with peeloffs and paint - I was hooked! Now my passion is my BUG! and now BEADING!

In the Cupboard you will find ideas, news, tips and techniques to help you get more from this fab little machine. So come in - join the fun and Cuttle with me!


Showing posts with label Altering die shapes. Show all posts

Friday, 16 December 2011

Well it's snowing!

Hi friends, we have snow today - it looks lovely from inside, but I glad I haven't got to go out!

I thought I'd show you another Chrissie card I'd made recently using a border die in different way, but then I had a message from Glenda saying that her new stamps called Pretty Birdcage and  Bees were launched yesterday.  The details are over on the DT blog (link on my sidebar)and if you pop over there you could be in with a chance of winning a lovely Chrissie present as Glenda is giving away two sets of stamps - so don't forget to leave a comment at the end of Glenda's post! The draw is open until Monday.

Now I can take you from a winter's day to a glimpse of summer

This was a challenge to me as I got out my paints for a delicate look.


I stamped the image on a full sheet of watercolour paper and completed the painting, I find this the easiest way to position the stamping in a shaped die.  From this close-up you will see that I have used an octagonal die, and as I like very narrow borders when I layer - I did a bit of crafty cutting!  I first cut a burgundy shape to match the base card, and embossed the edge.  Next cut the same size from the white watercolour paper, and embossed the edge.  After positioning the die over my painting I cut and again embossed the edge.

You may be thinking why cut two white octagons, well  I wanted depth the the finished image.  So on the plain paper I cut away the embossed edge to give me my narrow border.  (On this shape die this is much quicker that tracing and  cutting round the die.  If you don't have the full set of squares or rectangles you could also used this method for ease of layering.) Now I could use the cloud template from Diamond Cards that I illustrated a few weeks ago to give interest, which I  lightly inked with DI's.  Next I also cut away the embossed border from the painted image and embossed the cloud pattern again.  Having embossed the clouds I then cut part of them away and I had my depth!  Hope all this make sense - it may sound complicated but it very easy to do and any complication may be from my writing.  If you click on the close-up image you will see the finished image more clearly. 

Stay warm and safe and enjoy your crafting.
 

Monday, 5 December 2011

Using your borders in a different way

Once I make a start on Chrissie cards I find all sorts of things that have been packed away since last year and my mind goes into overdrive thinking I must use these this year?!?!?  
Many of my bits and bobs I like, so I 'm making a big effort to add them to cards.  Bet many of you have just such a stash!  Another thing, I just do not want to buy any more stamps or dies at the moment because I have other beady things that I want to spend my cash on.  BUT, how to make the old look like something different and new!?!!??  There's one way to make a border - can you guess which border die I used?
This is the die.   It's a Nestie borderabilitie.  It cuts on one side only and then you have the option to emboss the pattern.
 
But I've made it into something different.  To make the shape I cut two strips of paper from straight edges, turned them round and fastened them with tape, then added a strip of ribbon over the join.  Different and it gave some creative satisfaction! AND, I used some old embellishments, old paper stash from Basic Grey, ribbon that's been in the box for at least three years. 

Now what else can I use?????  
Back soon, happy crafting,


Friday, 6 May 2011

Friday's Followers Gallery

The card I'm putting in my FFG today is this lovely artwork from
Eileen showing great use of a circle die to create a moon!

As well as some super stamping and a great layout,
Eileen has used a brayer to create her background, an art that she has perfected.
  If you pop over to her blog  you will find some delightful work. 
 Thanks Eileen for allowing me of show off your fab card. 

Friday, 31 December 2010

Altering die shapes

I know it's nice to buy new die shapes, but when seeing C&C's Pick of the Week was 2 sets of 4 new dies called Labels A....to.....H at a cost of over £160, I couldn't help think.....expensive!  AND, where does it stop!    Some of the shapes interested me, but just how many dies do I need?   Will I use them?  HOW often?????  If money is not a problem - great, but what can you do if it is? 

Do you use ALL your dies?   I have to confess that I bought a set of Wonky Squares at least 3 months ago and they are sitting in my overcrowded box unused!  I needed them badly at the time, but did I?!?!?  I think now I did not! 

One of the solutions to buying dies is to look at your dies.....could you alter them?

With some of my dies the answer is "YES"!

Labels Small and Large can be made smaller or larger


Using the Labels 2 die like this.....

                   you have  a different shape

Tracy made a different shape with her Mega Rectangles cutting it like this....
and it turned out like this..


This is rather a nice shape, thanks Tracy.


Labels 4 die can be used this way

I have only change the top of the die, but you could easily change the straight edge by cutting the die again.


This is how I used the new shape
If this post has made you think, you will find my tutorials covering this subject under the labels section "Altering die shapes", and if you have discovered any new shapes that can be made from your dies - I'd love to hear from you so I can feature them in my Followers' Gallery.

Well it's the last day of the year and also my last post showing you round my blog.  I hope you have found something of interest and that the labels section will become a useful aid and a source of inspiration .  I have no problem with you using my ideas, but just ask that you mention the Cupboard when you do, so helping me spread the word of what this great little green bug can do!

Tomorrow I will take a look back at some of my favourite cards of 2010.  Have a Great New Years Eve.

Thursday, 28 October 2010

Unanswered questions

I realised that over the last few weeks I have received a lot of queries and questions and because of my various problems I have failed to answer them for you.  Sorry about this, and if I have missed your comment would you please remind me and I will try to put it right.

I have received one query from my post yesterday from Ann.   Ann asked how I'd acheived the top circle on the card without cutting the rest.  This is a little trick I use regularly and it is useful so I will try to explain.....

If you want only part of the die to cut, it's best to use low tack tape to attach the die in the right place on your image.   Then when making the sandwich  only place the top C plate on the part you want to cut, and feed the unplated part of the image through the Bug first.  Sometimes you have to cut the sides down to match the shaped top if you don't have the correct size die.  Have a look at this link it may help to explain it better.

 http://ikkiscuttlebugcupboard.blogspot.com/2010/08/nestabilities-label-4-aternative-cuts.html

Hope this helps Ann, and to you all again my thanks for your patience and understanding.

Monday, 6 September 2010

Nestabilities - Labels Small and Large - Change the shape!

Getting more mileage from my dies is a favourite pasttime of mine, and so here's another idea for you if you have the Labels Small and Large Rectangle dies.

                                                   
Yesterday I was playing about with this blue tag and Cosmic Shimmer Mists: Candy Pink and Angel Mist.   Having changed the colour and added a bit of shine, I used a Airondack Demin ink on stamps from Elusive Images and Rubber Stamped as a contrast.  I decided that the tag was too big, so I trimmed it down, but it was still not very inspiring.  After looking at several dies I was unable to find a die that fitted over the pattern, so.....

using one of the labels from the Rectangles Large and Small set,
 I taped the die across the top of the image and made a partial cut

then did the same to the other end

Again only cutting the edge.  Now using a ruler, trimmed the straight sides.

You will not be able to emboss this new shape with the tan mat, but.....
with a bit of patience you can do it with an embossing tool!
If you have not seen this post....check out the method  here.

Using another of the larger dies I have cut a mat slightly larger than my image in exactly the same way.

so I now have a new longer shape made from two much smaller dies.
I have not quite finished my card and will have to show you another time, but for now I have to abandon my craft desk for another matter.  Shame, I was enjoying myself, still it will be nice to have something to come back to!

Friday, 3 September 2010

Friday's Followers Gallery - 3rd Sept.

Hi, I'm late today with my FFG post and again I have to apologize to Julie, but this is what happened and if you read it in a book you would not believe it!

I returned home last night jubilant over a bowls match victory that gave us the 1st Division Ladies Championship. To unwind from the tension, I switched on the tele and started to watch a programme on not sleeping (something I'm good at) and being kept awake by snoring. It was interesting! The programme reached a point where this couple jumped into bed, the husband (being the snorer, of course) was going to try this new idea of placing a shield on the roof of his mouth, the wife leaned over, kissed him and said "goodnight" - switched off the light, the scene when black, we sat there also in darkness for a few seconds waiting for the prog to return - would the man be snoring or not!?!??!? Nothing, just as the light when out so did our power! 18 hours later, it's just come back on!

Anyway, back to Julie and her card.
This is what you call using your dies to the full!

If you pop over to Julie's blog you will find a detailed explanation of how to acheive this brill card.  Well done Jule, and thanks for sharing and allowing me put this in the Friday's Followers Gallery. 


I'm having a day out tomorrow since it's my birthday, but please feel free to have a look around the Cupboard, I'm sure you'll finding of interest in my back posts. 

Sunday, 29 August 2010

Nestabilities - Label 4 - Aternative cuts

Over the past week I have shown you how make 2 alternative die cuts, so why not make it 3!
The Label 4 die is one of my favourite shapes, but you can use it in another way.....

on a piece of card, tape the top of the die

Make sandwich:  A  /  B  /  Card  with taped die cut side down  /  C

You will notice that the C Plate is only placed on the die where the cut is wanted.
The uncovered part of the die is passed through the machine first.

The cut

Trim down the side and you have a shaped tag!
(When I use this method, I stamp my image first, then cut)

or you can turn the die and have a different shaped tag!!

If you wanted to make an even bigger shape you could do the same on the other edge.

See you tomorrow, 


Friday, 27 August 2010

Friday Followers Gallery

Hi everyone, today is FFG time and  I'm really pleased to bring you this idea as it follows on from my post on Monday and shows just what you can do with a bit of thinking out of the box.  On Tuesday, Tracy got in touch with me saying she had used my idea to solve her problem of her dies being too big for her image, and this was the result...
What Tracy did was....
cut a mega curved rectangle, but this was too big for her image, so....

by placing a smaller mega rectangle over the first cut

made a new shape! 

AND, I think is a very good shape that will be useful.  I do like value for money!

You will perhaps recognize the Butterfly image - it one of the Marianna dies, but instead of using it as a die, Tracy turned it into a stamp!  You can check this out by popping over to Tracy's blog.

 I love to hear that my ideas can be put to good use, and I'm happy to give credit where due which is why I started this FFG spot.  In return, if you use my ideas, I would appreciate you linking back to the Cupboard, that makes the Cupboard more available to others and my efforts even more worthwhile.  Thanks Tracy  - great crafting.
                                                                    

Monday, 23 August 2010

Nestabilities - Labels 2

Do you find sometimes that no matter how many dies you have none seem the right size or shape?  This happens to me quite often and it is real frustrating!

On my desk on last week's WOYWW I had a label 2 die cut on which I had watercoloured with Inktense pencils an image from the EI Townhouse Stamp themeplate.  Having done to a reasonable, but not entirely satisfactory colouring job, I looked the shape and thought...."now What"!  I could not come up with a design that looked right with the shape....so....knife in hand......holding breath.....I cut across the top and bottom of the die cut and ......

and I had a new shape


this new shape allowed me to stamp a scene onto a strip of card, matching up the tree and bush behind the house so that my new shape could be lifted on foam pads to give some dimension to the scene.  I like my new shape and think it could be very useful to ring the changes with the Label 2 dies - Wonder if any of the other labels can be changed?.....yet another challenge! 

Hope you like this idea, and if you use it - perhaps you would let me know so I can pop over.
                                                    

Monday, 28 June 2010

Cuttlebug Cupboard - Spellbinder Mega Rectangles

Today's tutorial is based on the Spellbinder's Mega Rectangles,  I actually did this way back in January, and somehow forgot to post it!  But, better later than never.
As with all the label dies, the difference between the sizes means that layering is more difficult.  If you like wide borders, you are okay - but what if you like to have narrow borders?  My friend, Andrea explained this to me, but it was only by playing that I cottoned on.   Cool Andrea! This is how you do it.

With the same die, cut 2 shapes  The die-cut with the image is then embossed.  You can use the TAN mat or an embossing tool to run round the edge whilst the die-cut in still in the die.   Following the line of the embossing, cut off the embossing.

and when fixed together.....you have a narrow border!  An alternative way would be to cut and emboss round the image as usual, then draw round the die and cut with scissors.  I have tried both ways and found that by cutting the edge off of the inner shape it was less noticeable if the cut was not exact! 

The next part of my card was to cut another die-cut - this time I used a border from the Joy Crafts range. These dies are smaller than the Spellbinders, but have their uses in your craft box.  Having cut the die, I inked and dusted with Metallic Perfect Pearls which is perfect for a grunge look!
Next some simple matting and layering, which I actually find not so simple to get square!

and my finished card......


The image is a digital download from Sketching Stamper which I love!  It's big and bold and beautiful!!
Hope you like this idea and will find a use for it in your crafting.  Thanks Andrea for your help.

Saturday, 5 June 2010

Nellie Snellen - Extending a rectangle die

I have received a query about my post yesterday and so to make my instructions more precise I have a few photos for you.

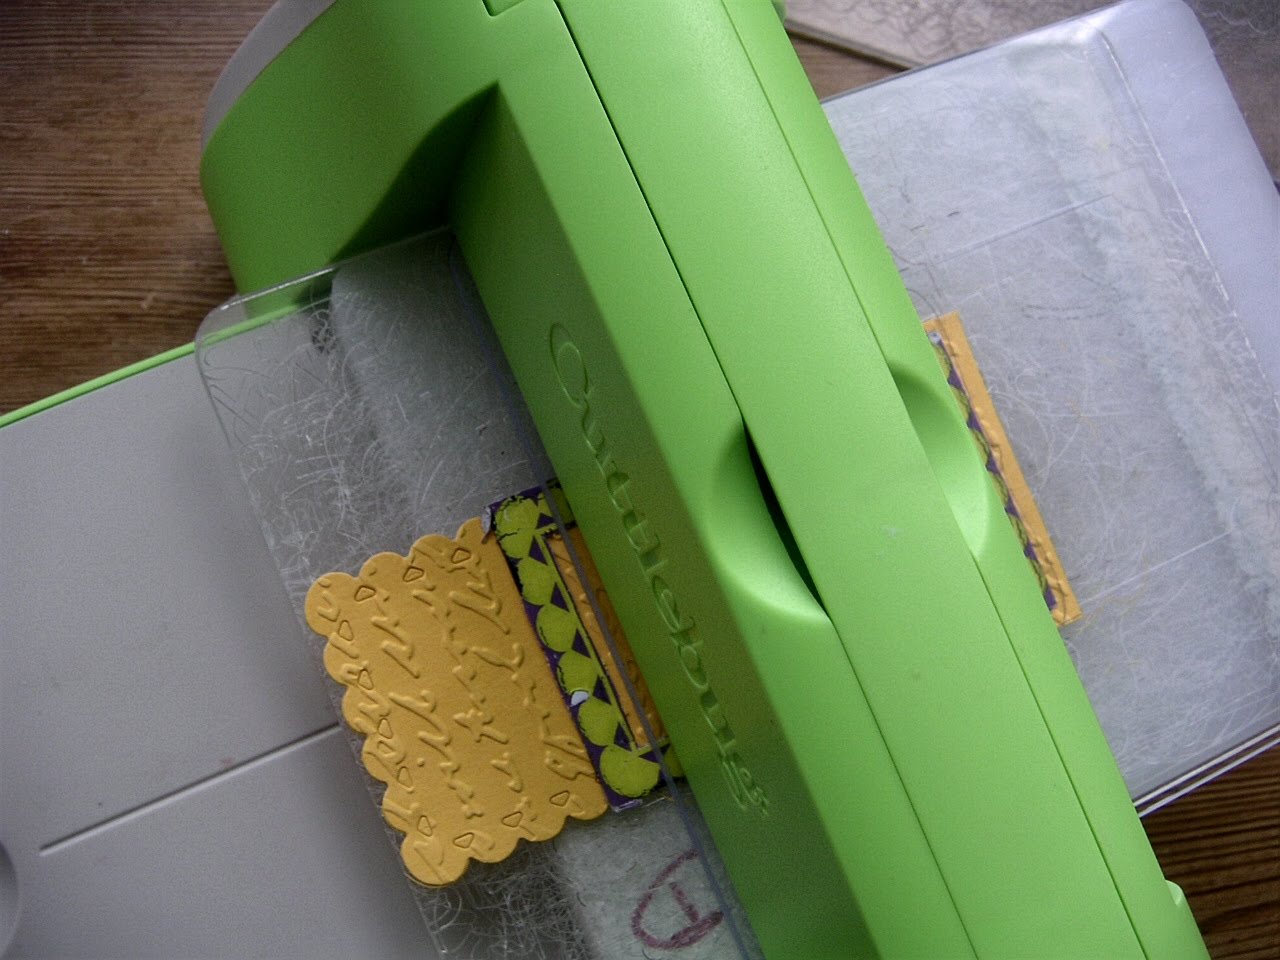
Emboss your strip of card

Position die

Run through the Bug to this point and then run back again 

so far....so good....you have your first cut

Place your die at the other end of the strip - part of the first cut will need to overlap the new cut and at this point it is important that they line up exactly

make your second cut

to this point - then run back again

your extended rectangle!


Sorry if I confused anyone with me brief instructions, hope these pictures will help you.
AND, thanks for letting me know - I would rather you tell me if I have made the instructions to brief, then I can put it right.  Sometimes I do something automatically and forget that I have been doing it for a long time and that others may not have!  Have a good day....