Hi

Hi, Thanks for dropping by.

My name is Eileen but to friends in the card making world I'm known as 'ikki'. (which is pronounced I-KEY) From where or how this came about I'm not sure - it just got shorten from my original craft name of Ikemo by various friends along my crafting way! I started crafting whilst recouperating from an accident, and from my first attempts with peeloffs and paint - I was hooked! Now my passion is my BUG! and now BEADING!

In the Cupboard you will find ideas, news, tips and techniques to help you get more from this fab little machine. So come in - join the fun and Cuttle with me!


Showing posts with label Nellie Snellen. Show all posts

Thursday, 9 June 2011

70th birthday

I was asked to make a card for a special 70th birthday and this is what I came up with.....


  On cream hammer card, I stamped in Versamark and heat embossed with a silver pearl powder.  The leaf dies are Marianne, the butterfly is from NS and the sentiment was PC generated and then cut out with a Nestie Label 4. 

I like to use a heavyweight textured card and have found that to add more texture and interest I can use stamps - Glenda's in particular are good because of their large swirly nature which can be twisted this way and that and end up looking like you've used a number of different ones instead of one!  

I thought you would like to see the insert of the card.  The verse is lovely and really useful - feel free to use it.

Sorry I have been such a bad blogger - life, pc problems and internet connections are causing me somewhat of a headache!

Monday, 28 March 2011

Less is More Challenge Week 8

This week's challenge over on Less is More is to use a DL sketch card - I thought at first - okay not too hard!  However, I was wrong because although I thought I had conquered the white space on square or A5 cards, the amount of space hanging about on this size made me quite uneasy.   Having searched about for a stamp that would be suitable and would you believe finding none that I fancied or just right, (I'm sure you will know what I mean!!!!!)  I decided to try to use a couple of old favourites in a different way along with a never used stamp and a new Nellie Snellen die. 
My collection of this and that - made this
The lace border I stamped in Black on white card and cut out - it surprised me how much like lace it looks!
 The NS Eastern die No.2 - makes a perfect mat for the
Nestie Large Classic circle No3 die
I cropped the Hampton Art stamp and coloured with Marvy Le Plume pens (also forgotten and unused for ages)
  The See D's rose I stamped onto shrink plastic (guess what? - yes, another much underused purchase)
I feel rather chuffed with my finished card ....

I love this stamp but had grown tired of using it, but by cropping the image it looked completely different and revitalized!
Another lesson learnt from the LIM challenge - there life in the old dog stamp yet -  thanks ladies you are doing a great job making me think and look in the cupboard at my forgotten stash! 
Mind you, you didn't managed to stop me buying at the NEC yesterday, but then I wasn't alone was I Chrissie!

Saturday, 5 June 2010

Nellie Snellen - Extending a rectangle die

I have received a query about my post yesterday and so to make my instructions more precise I have a few photos for you.

Emboss your strip of card

Position die

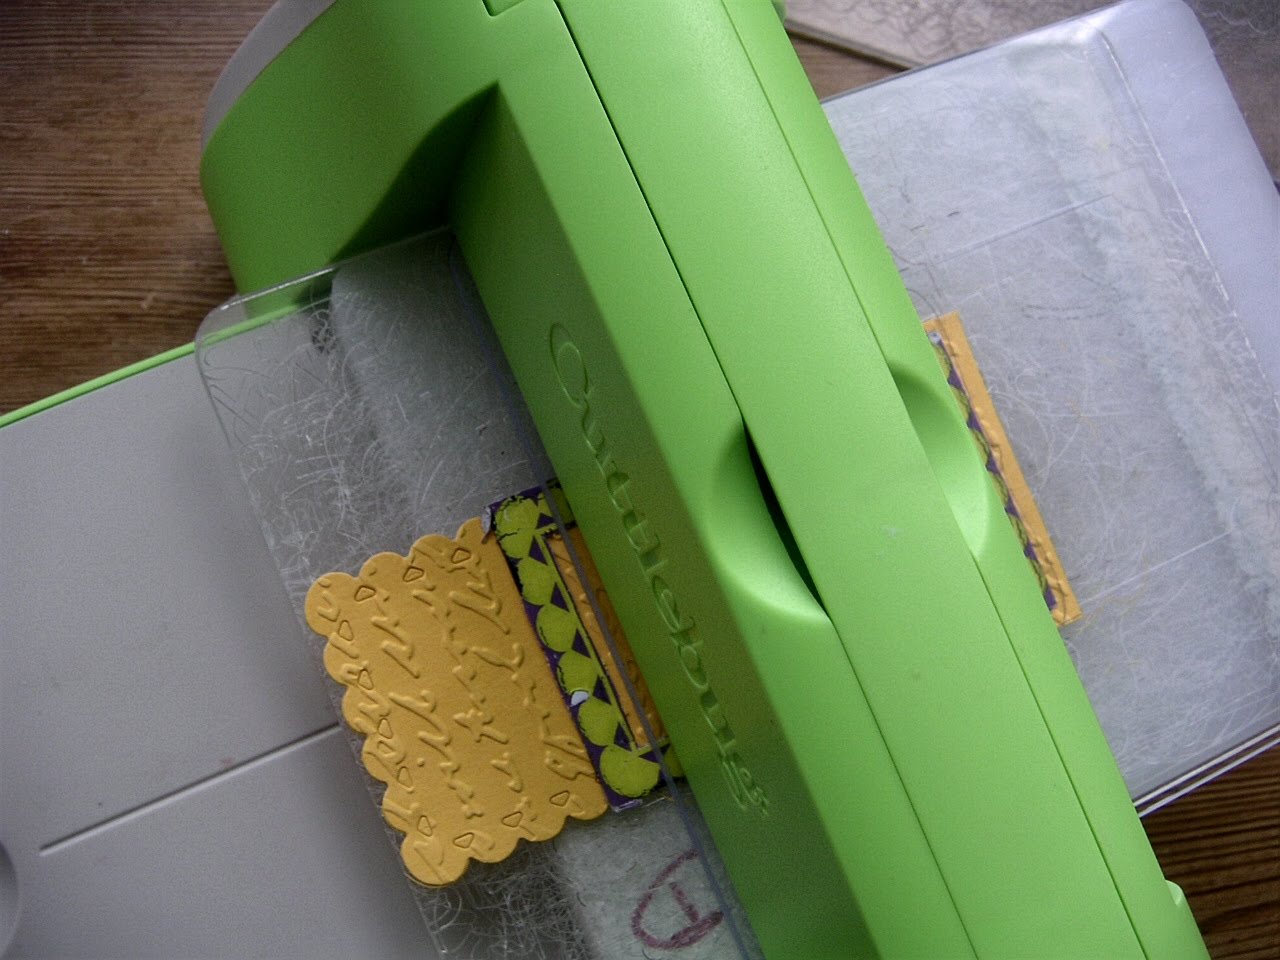
Run through the Bug to this point and then run back again 

so far....so good....you have your first cut

Place your die at the other end of the strip - part of the first cut will need to overlap the new cut and at this point it is important that they line up exactly

make your second cut

to this point - then run back again

your extended rectangle!


Sorry if I confused anyone with me brief instructions, hope these pictures will help you.
AND, thanks for letting me know - I would rather you tell me if I have made the instructions to brief, then I can put it right.  Sometimes I do something automatically and forget that I have been doing it for a long time and that others may not have!  Have a good day....

Friday, 4 June 2010

Nellie Snellen Rectangle Frames

I recently changed one of the Nestabilitie squares into a rectangle.  Today I thought I'd see if it was possible to change the Nellie Snellen rectangle die into a larger rectangle....the answer is yes you can!

For my card I used:
6" x 6" Cream card
Patterned vellum
black cardstock
CB folder: Texture
Nellie Snellen Medium Rectangle Die
Stamp: Elusive Images - Tulip Script
Ribbon


For a classie look this gold embossed patterned vellum gives a beautiful base layer
Next I embossed a piece of black card with the Texture folder - place the die on the card, but only cut 2/3rds.  Now reposition the die on the other end of the card and cut 2/3rds again.


Just noticed I've not push out all the bits!  The NS dies cut best if you place the die cut face up with the paper on top.  If your plates are bent....use the edge of the plate.
Sandwich:  A  /  C  /  die cut face up / card  /  B.

My finished card with added image....

This is a great image to colour with Promarkers and distress inks, and the triple embossing enhances the colours and compliments the richness of the cream vellum and embossed mat.
Have a good day!

Monday, 14 December 2009

Nellie Snellen Christmas card

Since it's time to get those last minute Christmas cards made, I thought I'd whisk up a little card for you using the Nellie Snellen Frame dies. These dies are proving to be very useful.

For the card:
8" x 4" Red card
1 Middle NS frame cut from red card and emboss with Crafts-two-you Snowflake folder
2 Small NS frames die-cuts from Basic Grey Paper and red card
Holly stamp
Wire, embellishment,
Perfect pearls

Centre crease and fold card.  Stamp edges for interest - I used a Holly stamp and dusted with gold metallic perfect pearls.
Cut one middle sized frame and one small frame from the red card.  Then one small frame from the BG paper.  To stop the cut-out bits falling out - tape the back.   If you do push out the cut-out bits - tip - do it over a bin or you 'll be getting the hoover out!


When assembled - a two tone effect.


The finished card


I think on reflection that a two-tone effect would have looked good on the back frame!  I do like these 4 x 4 cards - hope you do too! 

I'll have another card for you tomorrow - thanks for dropping by.

Thursday, 3 December 2009

Nellie Snellen Rectangle Frame Dies - Make a border....

Nellie Snellen Frame Dies are becoming very popular and when you see them you can understand why. But can you use them for anything other than frames or mats???

Yes, you can .... you can make a border....take the smallest  frame and cut 2 shapes....then join them together...add a strip of decorative paper.....

                                                   
add an image.....my finished card.....nice border Nellie Snellen!


 .I think my 3 year old Granddaughter will love his red nose and wobbly eyes.

Sunday, 29 November 2009

Cuttlebug, Pierceabilitie Border and Nellie Snellen Frame

Hi, Today's card (24) is one I have enjoyed making. Why? Well I've been saying all week, inspiration has been lacking from my card head! But, when I received a set of Nellie Snellen Frames from my supplier, I wanted to use them....immediately....this is what my head led me to....
What I used on the card front:
Nellie Snellen Rectangle Frame
Crafts-too-you Snowflake folder
Hero Arts - Collage Season's greeting
Bits and Bobs

What I did:
I first embossed the base card - carrying the pattern over to the back, which I finished off with 2 score lines. I like this finish - it looks professional. 

Having stamped and cut down the image, I had a go at the over-lapping technique.  This was my first attempt and it was a bit tricky, but it turned out okay.  If you would like to see how this is done -
Rachel Jakes will show you


For the inside of the card I used:
Spellbinder Pierceabilities Die
With these dies you can adjust the width of your border. So having cut one, I then cut another slightly bigger to create a different coloured edge.  Then I had to cut another to hide a mark !!!!!   Our secret!  The debossed pattern gives added interest.

If you would like to view these new folders from NS you can do so by clicking on the side bar link to Liz, at Making a Lasting Impression.

See you tomorrow....


PS: Message to Kate (unable to contact you direct you have left no address)
Question: What is a paper shim. Answer: A piece of scrap paper placed over the paper being embossed so that the embossing does not cut into the paper.