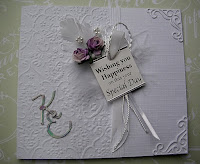
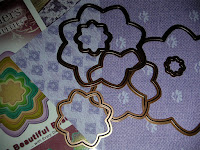
Hi everyone, gosh the weeks are flying by. I have even made my first Christmas card this week, only I add because it was the project at my class meet. I've never started this early, usually it's mid November before I can face tinsel time!
My main focus this week has been on creating a Wedding, a Ruby and a Golden Wedding Card. Making them made me think about using bits and pieces from my stash and also at looking closely at dies, Cuttlebug folders, papers and cardstock. You buy must have things and sometimes fail to get the best out of them - does this sound familiar - or is it just me?????
These are the cards I mananged to make
Whilst printing out the front words and inserts for the cards, I remembered a tip given to me on another crafting forum and that was a recipe for changing the colour to get better shades of gold, silver and copper. And, so for you to try....
Gold - Red 192
Green 168
Blue 104
Deeper Gold - Red 165
Green 138
Blue 82
Silver - Red 151
Green 151
Blue 168
Copper - Red 205
Green 115
Blue 0
I used the deeper gold shade on the front on the GWA Card - it's a really good colour, better than the gold on my editing programme. AND, so easy to change and save for another day!
Thanks for popping in, hope you find this tip useful.
Hi
Hi, Thanks for dropping by.
My name is Eileen but to friends in the card making world I'm known as 'ikki'. (which is pronounced I-KEY) From where or how this came about I'm not sure - it just got shorten from my original craft name of Ikemo by various friends along my crafting way! I started crafting whilst recouperating from an accident, and from my first attempts with peeloffs and paint - I was hooked! Now my passion is my BUG! and now BEADING!
In the Cupboard you will find ideas, news, tips and techniques to help you get more from this fab little machine. So come in - join the fun and Cuttle with me!
Pages
Thursday, 30 July 2009
Monday, 27 July 2009
Spellbinders Nestabilities - Dahlia
I have had a bit of a crafting block/disastrer this week - my room looks like a tornado has struck! Lots of things scattered, floor covered, plus also every available space, nook and crannie on my desk littered. Crafting has not gone well! I have made every mistake possible, creased my embossing, cut up bits that I need, lost other bits, found bits of that I had forgotten I had, this meant that I lost track of what I was doing. I start this, left that - result nothing finished, I have been completely unable to make any decisions on card, style, paper. In the end I watched the tele - crafting of course!
But, it's Monday - so I started again, and made a Dahlia flower.
Materials needed
Card A6
Cuttlebug Frills Fancy Border die
Nestabilites Dahlia Dies
(you could use any of the flower dies)
3 patterned papers
Ribbon and bits
Using the card as a tent fold, emboss the edge with the border folder. To achieve this look I have cut the folder and rejoined as required to get the pattern.
Next cut out your flower layers in different papers
Follow this folding making 4 firm crease line across the flower
Assemble flower - I glued the two large layers together in the centre to give some strength.
Quite a big flower! I don't think I will lose this one, but then...
Labels:
Border Embossing Folders,
Dahlia,
Nestabilities,
Tutorial
Thursday, 23 July 2009
Tippy Thursday - Last day to enter Spellbinder's Draw
Over the last 13 days Spellbinder's have been revealing their new 17 dies. Each day I have listed the details and pictures of the dies and you will find them in the post below this post. I thought seeing them all together would make it easier to make a decision as to any future purchases. Spellbinder's have certainly gone to town with their new products, I wish I had made a collection of the new pendant and border dies because now I'm confused. Which to I like? Which will be the most useful? When will theses 17 dies arrive in England? I know that the pendant and border dies are available at my suppliers - so if you have not seen these, or would like to.... here is a link.
Now, if you have not enter the draw to win the new dies, today is your last chance.
The last link is Keri Lee Sereika with a great video on using the Christmas Cheer and light dieson a scrapbook page. Pop over there now to enter - you might be the lucky one!
Now, if you have not enter the draw to win the new dies, today is your last chance.
The last link is Keri Lee Sereika with a great video on using the Christmas Cheer and light dieson a scrapbook page. Pop over there now to enter - you might be the lucky one!
Tippy Thursday - New Dies
Today is Day 13 of Spellbinders reveal of their new dies. If you have missed visiting any, or would like to join in the fun, more new dies will be revealed until 22nd July. AND, you have a chance of winning if you entry their draw. The links are here
So far the dies unveiled are:
S4-225 Holiday Cheer and S7-015 Grand 12″ Holiday Lights Border
S5-018 Poinsettia Frameability
is made up of a large frame, small frame and two accents.
large frame is 4 1/8" x 6 1/8"
small frame are 3 5/16" x 2 9/16".
S4-230 Labels Six
9/16” x 3/8”
1 3/8” x 15/16”
2 1/8” x 1 7/16”
3” x 2”
3 15/16” x 2 11/16”
4 7/8” x 3 3/8”
S4-233 Labels Nine Die Templates
3 ¾” x 3 7/8”
3 1/8” x 3 ¼”
2 ½” x 2 5/8”
1 7/8” x 2”
1 3/8” x 1 3/8”
7/8” x 7/8”
S4-222 Create A Flake 1
Largest Flake 2-5/8ths; Smallest Flake 1/2”
S4-224 Snowflake Borderabilities PetiteSmallest Border 5-1/2”x1-1/4”; Largest Border 5-1/2”x1-1/2”
Poinsettia Borderabilities Grand -S7-016
Measurements: 12 x 2-3/4"
S4-231 Labels 7
4 x 3 1/8
3 3/8 x 2.5
2 5/8 x 2
2 x 1.5
1 3/8 x 1
3/4 x 1/2
I2-1005 Circle Cut Impressabilities
Nesting Maple Leaf S4-228
Measurements: Largest Leaf 3-7/8'' x 3-5/8'', Medium Leaf 2-1/4'' x 2-1/8'', Small Leaf 1'' x 7/8''
and second one is Harvest Borderabilities Petite S4-226
Measurements: Border with Leaves 5-1/2'' x 1'', Border with Pumpkins 5-1/2'' x 1''
Nested Poinsettia - S4-219
Measurements: Largest Length x Width 3-3/4” x 4”
Medium 2-3/4” x 2-1/2”
Small 1-1/2” x 1-1/2”.
Ribbon Tag Trio - S4 234
Oval: 2 5/8” x 1 ½”
Rectangle Short:2 3/8” x 1 ½”
Retangle Long: 3 3/8” x 1”
Labels 5 - S4-229
Measurements - largest to smallest:
3 3/4 x 4 1/8”
3 x 3 3/8”
2 3/8 x 2 5/8”
1 3/4 x 2”
1 1/8 x 1 1/4”
5/8 x 5/8”
Nesting Pine Tree - S4-220
Measurements: small 1-1/4" tall, medium 2-3/4" tall, large 4-1/2" tall
Labels 8 - S5 019
The largest die template in the Labels 8 set is a whopping 5-7/16” x 3-15/16” (almost 5-1/2” x 4”).
Monday, 20 July 2009
Nestabilities : Emboss a double frame on your card
Hi, This week I have been tackling embossing a double frame onto a card front. I say tackling because I've found this a puzzle! Which way do the dies go? Which side of the card? The Sandwich? Stopping the dies moving? For a simple exercise - a lot of questions!
With the help of my blogging buddy Chrissie, this is what I finally decided was a good technique to achieving this.
How do you get your square in the centre of the magnetic mat? My mat is the size of a C5 card ( 6 x 4) so I measured the position and draw round the largest die with a permentant pen.
Place the mat on the A Plate. Position the dies
Make the full sandwich:
A Plate, Magnetic Mat, Dies cut side up, CARD with the outside face down, Tan Mat, 2 B Plates.
The tricky bit is getting the card to stay where you want it! If you don't you get a wonky square! You could use low tack tape to hold the card in place or post it's. I found that placing the magnetic mat on the A plate first enabled me to set up the dies easily within the drawn lines on the magnetic mat. Then because the mat was the same size as my card, I could place the card in exactly the right position.
Chrissie uses a slightly different method this is what she says:
"I fold the card then place it right side up on the b plate. On top of this, on what will be the back of the card, I place my magnetic mat and then the nestie or embossing die, cutting side uppermost. I then fold over the card, place the tan mat on top of that, then the second B plate and roll through the cuttlebug. The magnetic sheet helps to ensure that the die doesn't shift on its way through the bug and also acts as a shim the aid the embossing."
This card was made by Chrissie.
It's simplicity makes it stunning! If you need inspiration - you now know where to visit.
Thanks Chrissie.
Now you have two methods of acheiving the same result. Slightly different in the sandwich, but they both work!
If you have another way of doing this.... please let me know.
Using 2 dies makes a great embossed frame on textured cardstock. Then to finish the card you simply cut another of the smaller squares in a patterned paper, emboss the edge with an embossing pen and glue in place. A small embellisment, a stamped image or just a sentiment is all you need to complete a simple but classie card. Ideal for that difficult card, when you want to show you care, but don't want to go OTT!
Less is more - I'm sure you will agree!
I have updated the details and illustrations of the new dies currently being introduced - check out the last post to see them all. If you are interested in the Pendant and Border dies introduce about a month ago, my supplier (see side bar) has some of these in stock.
With the help of my blogging buddy Chrissie, this is what I finally decided was a good technique to achieving this.
How do you get your square in the centre of the magnetic mat? My mat is the size of a C5 card ( 6 x 4) so I measured the position and draw round the largest die with a permentant pen.
Place the mat on the A Plate. Position the dies
Make the full sandwich:
A Plate, Magnetic Mat, Dies cut side up, CARD with the outside face down, Tan Mat, 2 B Plates.
The tricky bit is getting the card to stay where you want it! If you don't you get a wonky square! You could use low tack tape to hold the card in place or post it's. I found that placing the magnetic mat on the A plate first enabled me to set up the dies easily within the drawn lines on the magnetic mat. Then because the mat was the same size as my card, I could place the card in exactly the right position.
Chrissie uses a slightly different method this is what she says:
"I fold the card then place it right side up on the b plate. On top of this, on what will be the back of the card, I place my magnetic mat and then the nestie or embossing die, cutting side uppermost. I then fold over the card, place the tan mat on top of that, then the second B plate and roll through the cuttlebug. The magnetic sheet helps to ensure that the die doesn't shift on its way through the bug and also acts as a shim the aid the embossing."
This card was made by Chrissie.
It's simplicity makes it stunning! If you need inspiration - you now know where to visit.
Thanks Chrissie.
Now you have two methods of acheiving the same result. Slightly different in the sandwich, but they both work!
If you have another way of doing this.... please let me know.
Using 2 dies makes a great embossed frame on textured cardstock. Then to finish the card you simply cut another of the smaller squares in a patterned paper, emboss the edge with an embossing pen and glue in place. A small embellisment, a stamped image or just a sentiment is all you need to complete a simple but classie card. Ideal for that difficult card, when you want to show you care, but don't want to go OTT!
Less is more - I'm sure you will agree!
I have updated the details and illustrations of the new dies currently being introduced - check out the last post to see them all. If you are interested in the Pendant and Border dies introduce about a month ago, my supplier (see side bar) has some of these in stock.
Labels:
Double embossing,
Magnetic Mats,
Nestabilities,
Squares,
Tutorial
Sunday, 12 July 2009
Cuttlebug - Birthday Candles
A few weeks ago I decided I must have the Cuttlebug Birthday Wishes - a cutting die and embossing folder. At the time it seemed a good idea, but when I tried using it I was disappointed with my efforts. Very boring to say the least!
However, I'm one of those people that doesn't like to be beaten, so I've had another go! I decided that the way the folder was hinged was my problem - so I cut it in half and re-joined with masking tape along the bottom edge. This meant I could alter the folder hinge to where I wanted to emboss the pattern. I'm not
suggesting that you do this - but it does work!
I started off with a 4.1/2" square card only because I have envelopes this size. However, now I've cut the folder, the size of the card can be adjusted easily. Instead of embossing straight on to the card, I covered the card with a striped paper and ran it through the bug. It was not entirely successful, I discovered that when doing this you need a paper shim on top of the pattern paper or else the embossing is too deep and cuts into the surface.
This is the result
With embossing this way you also have a pattern on the inside of the card, and so I only needed to cut out the word die and an additional candle to finish.
With a tag embellishment, and again using the word die (which I love) I was quite pleased with the end result.
So, I tweaked it a bit and made this!
The embossing was done in the same way, but by matching the pattern you can add another layer. With a bit of ribbon, a few eyelets - a much improved card! The first one was okay, but I have to say I like this one the best.
Happy cuttling,
Subscribe to:
Posts (Atom)