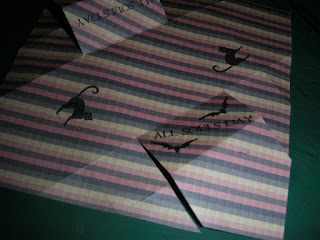
Today I'm posting a tutorial of the Trick and Treat boxes that so many of you were interesting in.....
with a ruler, draw 2 lines corner to corner - fold all 4 corners into the centre
unfold - then refold again as shown taking the corner to the crease line of the first fold
You can now decorate the sides of the box
Now you need to cut 4 lines using the creases for a guide
nearly there.....
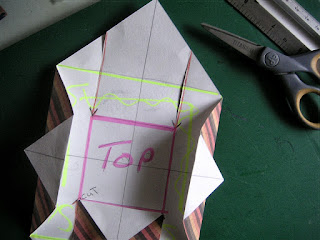
now another 4 folds as shown taking the corners back on themselves - you could do this before you make the cuts.
you could use a paper clip
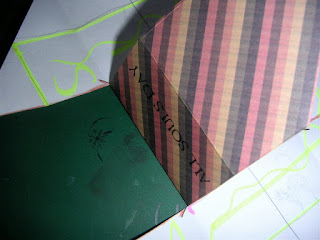
one side done....
now fold the flap over.....to secure
Your box! HOPE YOU'RE STILL WITH ME? You now have the lid of the box.
To complete the base - your square of paper needs to be trimmed by 3/8" inch on two sides only to make it slightly smaller, then folded in exactly the same way.
The first one is always the difficult one!
The secret is to make sure your creases are crisp mand fold accurate.
Hope you'll have a go and if the instructions are confusing....SHOUT!


12 comments:
Glad Dave is improving Ikki. Your Mojo is bound to wander with the worry of Dave being so poorly, it will be back, don't worry! Take care, great tutorial by the way, Judith xx
Hi Ikki
Hope things are continuing to improve.
I have just had a go at the box (in my lunch hour at work)and it has turned out perfectly although the girls here think I'm crackers cutting and folding away like a mad man. They don't know what they are missing. lol.
Thanks
Stampersue
X
thanks Ikki, printed instructions out so can have a go in peace later on!
Fantastic,thankyou so much for this Ikki,I made one of these ages ago and forgot how I made it,so pleased to have you jog my memory! Thanks again,Julie.
p.s. thought you might like to see another bug card!
http://julie-rainbowdays.blogspot.com/2010/09/scalloped-circles.html
Thanks for the tutorial for this cute box. Just made a base and lid in under 5 mins. Easy when you know how. x
What a great gift box, thanks for the instructions
Jenni
Ikki, I know these boxes for ages. May I give you another tip? If you have a square shop-bought card that you like a lot, you can cut that in half and fold the box from the 2 pieces. The card front will be the lid, the card back is the bottom, you just have to make the bottom square a tiny bit smaller. If you have perhaps "Happy Birthday" in your card, it will appear inside the box after folding. Very nice as a wrapper for costume jewellery, etc. If you do not like the picture on the card, you can cover it up with paper of your choice or a 3-D flower, etc. But even then you have quite a sturdy firm box. Last year I made lots of small boxes from Christmas cards, added numbers on the lid and used it as an advent calender to send to my friend, filled with chocolate and other small treats.
Hope you like my idea?
Take care and I hope your dh is feeling better.
Nessie
So glad that Dave is feeling better. Maybe you can start to relax about it a bit now.
The boxes look fun so I'll have to have a go.
Have just got a 'bug and am loving it. I can see how you got hooked.
Take care.
Gina R
Glad to hear that Dave is improving and to see you 'back in business'. We all appreciate your hard work on our behalf, and don't worry - your mojo is still there - just needs the opportunity to focus again! Lots of love and prayers.
Chris
So pleased to hear Dave is slowly improving. Let's hope the infection is on the way out now. Love this box. I've made them in the past too - good tips, Nessie! I made them as part of my Christmas table decoration once, with an initial for each person in gold on the lid, and a choccie in each box!
So glad to see your post Ikki as I was concerned about you both. Hope things continue to improve both with Dave's recuperation and your mojo.
Thanks for taking time to share how to make these little boxes.
Hugs
Lesley Xx
Great tutorial Ikki....love all the suggestions on how to use them that other commentors have added. Glad to hear that Dave is on the road to recovery too. Take care.
Post a Comment