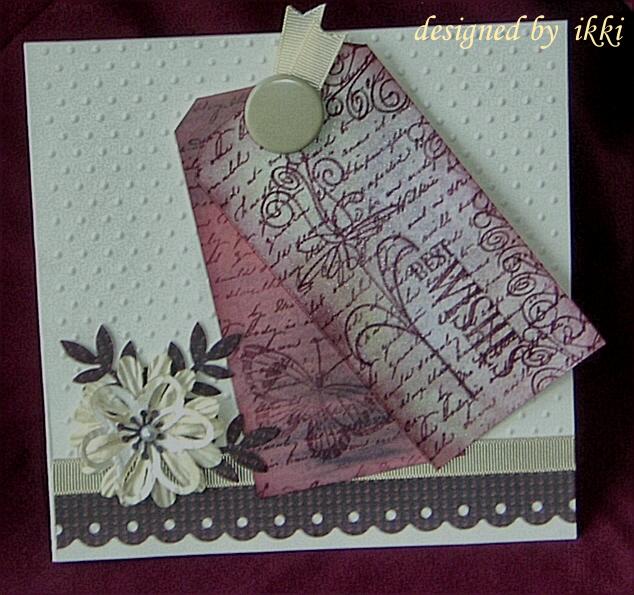
Hi

Hi, Thanks for dropping by.

My name is Eileen but to friends in the card making world I'm known as 'ikki'. (which is pronounced I-KEY) From where or how this came about I'm not sure - it just got shorten from my original craft name of Ikemo by various friends along my crafting way! I started crafting whilst recouperating from an accident, and from my first attempts with peeloffs and paint - I was hooked! Now my passion is my BUG! and now BEADING!

In the Cupboard you will find ideas, news, tips and techniques to help you get more from this fab little machine. So come in - join the fun and Cuttle with me!


Showing posts with label Cuttlebug Folders. Show all posts

Tuesday, 16 November 2010

Nestabilities - Squares

I think the basic squares are soooo useful, and can be made to look different if you can conbine it with other  square shapes. 

Here I have cut a red large classic square, then with a smaller big square scallop die, cut out the centre to make a frame. If you want the stamp the edge of your square, don't do as I did - stamp before you cut!

With another square of decorative paper behind the frame you have.....
You will notice that I have embossed only part of the Craft-2-U snowflake folder straight onto the card base and added two lines to finish the pattern.  At a busy time of cardmaking, this is a useful technique!

If you have not done this before, my tip is to place the folder on the card where you want the pattern to be embossed, then place the second B plate on the edge of the folder and guide the uncovered back through first.  If the folder should mark the card, THE LINES WILL COVER THE IMPRESSION.   Scoreboard scores again!

Monday, 15 November 2010

Spellbinders Octagon Nestabilities

I'm beginning to get my head round the fact that Christmas is not that far away and I need to start making a few cards.  I had this idea for a quick card to get me going......

I cut  2 dark green octagons from the largest scallop die and a smaller white plain octagon.   On one of the green scallops, I ramdomly stamped a few swirls and snowflakes in silver, covered with clear embossing powder the heated. 

On the other piece of dark green ( the back ) I did this....
made a line and folded.  Now the two pieces can be joined with a strong glue.

Next I embossed the white shape with the winter scene folder, and embossed the edge with an embossing pen instead of putting through the Bug again.  With  a touch of distress ink in bundle sage round the edge and a sentiment stamped in the same shade, all that was needed was  a bit of  glitter, a ribbon, a star, and a few foam pads.


The card stands up well and is certainly a quick make.
Thanks for dropping by, 

Saturday, 13 November 2010

Hi my friends, I send you all greetings and my very best wishes on this World Kindness Day!
A day to say thank you for the kindness you have shown in caring and thinking about Dave and myself over the last two months when life was painfull, and difficult.  Your kindness in sending messages from all over the world has been a great comform and very much appreciated by us both.  I hope on this day that life is well with you and yours and that kindness surrounds you.  There is a saying "little things mean a lot!" - how true we have found this to be!! 

It seems that I have not been posting a great deal of crafting or tutorials of  late.  One reason, although being on the EIDT is a fab experience and I'm enjoying the challenge, it is time consuming and because we are producing samples of new stamps I'm not able at the time to share them with you.  So, I was very excited to learn that the new Family Christmas stamps are being released soon and you will be able to visit the gallery and see what we have all been up to!?!?!?

In the meantime I thought you might like to see one of my Christmas cards made with EI stamps 


I have used 2 sizes of  mega rectangle dies - one larger stamped, coloured with distress inks and Promarkers and then triple embossed.  The smaller embossed with the Swiss Dots folder.  The circle is another Spellbinder die stamped, coloured and guess what?  Yes, triple embossed.  Although these dies may have been about for a long time, they are still useful aids to crafting, and by combining different dies you can certainly make interesting cards!  Have you looked at your old dies recently?  Have you tried combining different shapes?  Have you any interesting examples to show me?  Would love to hear from you! 

Thanks for dropping by, kind regards, 
 

Monday, 12 July 2010

Cuttlebug - Embossed Gift Card

It seems the custom now-a-days is to give money as a wedding gift, but a cheque in an envelope is a bit boring and basic, so I thought make a gift card for the bride and groom. Cuttlebug folders are ideal for wedding and anniversary cards, I use them frequently - Swiss dots, D'vine Swirl and Texture being my favourites. Whether you are giving a cheque or a voucher, for whatever occasion, you might find this useful.

I used:
4" x 4" Cream Hammer card
4" x 2.1/2" Cream card for the pocket
2" x 2" Cream card for the embellishment
4" x 1" Pink card for the contrast on the pocket
CB Textile Texture folder
CB Wedding folder - Bride & Groom
Fiskar border punch - Sunburst
Round edge corner punch
Chalk, ribbon bow and gem


Emboss the front of the card with the Texture folder and round the corners. Chalk the edges - if you know the wedding colour scheme this is always a good choice.

Emboss the 4" x 2.1/2" piece of cream card matching the pattern to the front embossing - this is worth doing as you will see later.

Emboss the Bride and Groom on the 2" x 2" and round the corners - lightly chalk the edges. I added a heart gem in the same colour. Mount on card with foam pads.

For the pocket on the inside, first punch a border on the already embossed cream card and glue the pink strip under the punched pattern. This is where matching the pattern is important. Tape the sides and bottom, (you don't want to lose that cheque) and stick to card. Trim and round corners. This folder looks great embossed or debossed so you get a good look on the front, and inside front of the card, the D'vine Swirls folder also works well. I added a single page insert with a message.

My finished gift card - I think you will agree that it looks better than a plain envelope.
As I mentioned before, you could adapt this idea for any money or gift token gift card, it's very quick and easy to make, and Christmas is coming!!!!

Monday, 5 July 2010

Cuttlebug Textile Texture Folder - Wedding Card

Hi, the Cupboard is full of ideas and techniques and some get lost on the back shelves!  This card is one I made in August 09, and since it is an usual design I thought I would re-posting it for all the new visitors that drop by for a look in the cupboard.  Hope you like it!

I have made a number of wedding and anniversary cards lately, and have received queries on how I achieved the lines below my embossing. This I do with a score board - it is one of the most useful tools I have.

This is my most recent card that shows how effective lines can be.

I first printed the words on to a 6" x 6" card and then embossed the top half of the middle section with the Cuttlebug Textile Texture folder.

Then used the score board to emboss lines to frame to pattern.

Again using the score board, I added lines to the heart shape for interest. It's difficult to emboss die cut shapes and at the same time retain the embossed edge which I like, so this was an experiment which turned out well.
My finished card with a few bits and pieces added - actually the bouquet took longer to make than the card, but, I did enjoy doing it! AND, isn't that what crafting is all about!!
Thanks for dropping by, look forward to hearing from you.

Friday, 25 June 2010

Friday Followers Gallery

Today in my FFG I'm doing something different - 2 cards.  Both cards were made by Ann and illustrate how the same idea can look totally different by changing the colours.


You can read Ann's post here

change the colour - change the look!

  
A different take on the same idea and well worth a read.

Ann your cards are great, and something I have never seen done before and I'm sure others won't have either.  Thanks for allowing me to put your work in my FFG. 

If you have card that you think is different and would like to share with us, pleased get in touch with me. 

Sunday, 13 June 2010

Cuttlebug Script embossing folder

One of the things I like doing is to make my own embellishments, mainly because it gives me the opportunity to experiment and mess about!

I made this tag by embossing a piece of silver mirri card with the CB Script folder, then changed the colour with  alcohol inks.  The stamp is from Creative Expressions Birds which, of course, I triple embossed.  Only a wee postage stamp, but just enough to finish off my tag.   A case of less is more!

This is how I used the tag....

A simple, but effective card using alcohol inks to enhance and give life to the embossing.


Tuesday, 8 June 2010

Make a fold-back edge card - part 2

As promised earlier, I have my finished card to show. 


The stamp I used for making this embellishment is from Rubber Stampede and is called Solidago Sprig.  Not sure what the technique is called, but I stamped the main sprig and two shadow sprigs onto a background I'd created by misting water onto distress inks.  It  looked ready for the bin until the magic of embossing powder brought it to life.  This technique has me hooked!   


If you have not read my earlier post on how to make the base card, you will find it below.  However, since one of my friends has accused me of being naught for tempting her to buy more stash - I will add that you can make this card with a border punch if you don't have a borderabilitie die. 

Thanks for dropping by.

Spellbinder Borderabilities - make an edged fold back card

Today I have a new idea that I hope you'll like and find useful.  I have made an edged fold back card - don't know how else to describe it! 

This technique will allow you to use all the embossing folders on a 5.1/2" square card with no worries about matching the pattern. 

What I used:  CB Swiss Dots and Spades borderabilities
What I did:

With the die taped to the inside front - run through the Bug


Next you emboss the die pattern  -  Save the cut out bits!!!!!

use the embossing folder from the centre fold
emboss three lines from the inside of the card

fold back the edge

from the inside your card will look like this

Cut a patterned paper with the same die - save the bits!!!

Place masking tape over the back of the fold
now you can add the cut out bits from the DP

add the DP to the inside of your card and also the cut out bits from the front card

and you are finished......


This has been a long tutorial - I have tried to let the pictures do the talking, but if anything is not clear - please leave me a comment.  If you try it - I would appreciate you linking back to the Cupboard - help me spread the wonders of the Bug!
Drop by later and I will show you my finished card. 

Friday, 4 June 2010

Nellie Snellen Rectangle Frames

I recently changed one of the Nestabilitie squares into a rectangle.  Today I thought I'd see if it was possible to change the Nellie Snellen rectangle die into a larger rectangle....the answer is yes you can!

For my card I used:
6" x 6" Cream card
Patterned vellum
black cardstock
CB folder: Texture
Nellie Snellen Medium Rectangle Die
Stamp: Elusive Images - Tulip Script
Ribbon


For a classie look this gold embossed patterned vellum gives a beautiful base layer
Next I embossed a piece of black card with the Texture folder - place the die on the card, but only cut 2/3rds.  Now reposition the die on the other end of the card and cut 2/3rds again.


Just noticed I've not push out all the bits!  The NS dies cut best if you place the die cut face up with the paper on top.  If your plates are bent....use the edge of the plate.
Sandwich:  A  /  C  /  die cut face up / card  /  B.

My finished card with added image....

This is a great image to colour with Promarkers and distress inks, and the triple embossing enhances the colours and compliments the richness of the cream vellum and embossed mat.
Have a good day!

Thursday, 3 June 2010

Embossing Folders

Tippy Thursday and not a lot to say!   Yesterday was a sad day,  also a busy one trying to catch up with WOYWW.  I managed to visit some desks and very interesting they were too...now for a few more!  Catch you soon.

1jmass:  In answer to your question - sorry I do not have a list of the Cuttlebug Folders, and I don't know of anyone who has!  If you are reading this and can help please contact me and I will pass on the info.

You could look at this link:  http://www.provocraft.com/products/catalog.php?cl=cuttlebug&scl=embossing
I was very surprised to see sooooo many folders on embossing, and a lot of new ones too!  The only problem with their A2 size is that it's a bit small for our A6 card and because of this the card can crease at the edges.  As for their 5 x 7 size - the use of this is limiting to me and also confusing - why if the Bug rollers are 6" do they do this size?  I like to emboss straight on to the card and not wrap the card round the folder, as this give me more useage.  But, 7" portrait - not for me!  Now I would like a 6" x 6" folder.  Craft 2 U do a 5" x 5" so hopefully my ideal size will soon be here!

Thanks to all who gave me their opinion on the search feature.  SOOOOOO pleased it works!

Now I have to go a blog visiting, back soon.

Monday, 10 May 2010

Nestabilities - Labels 4


Another quick card for you....


Stamp: Great Impressions  -  cute and also great for different occasion cards
Nestabilities: Labels 4 and Doodle Parts
CB: Happy Birthday Folder
DP: Dovecraft - bargain pad for £1

Sorry about the quality of the picture - if anyone knows how to photograph silver mirri card, I like to know please!

Sunday, 18 April 2010

Cuttlebug embossing and stamped tags

Today I have followed my own advice to pick a paper before starting to colour anything!   
I knew I wanted to make a tag and use a new stamp, but in the end used two tags and 4 stamps.  Distress inks enabled me to shade the tags to the DP's.  Two years ago I never stamped, but these days I have to admit an addiction, add Distress inks, inky fingers and I'm happy! 


The top layer of the flower was made using a Provocraft die, which I embossd with the script folder for texture. 

Have a great Sunday.

Monday, 22 March 2010

Cuttlebug Cupboard - Sheena Douglass stamps

One of my favourite crafters is Sheena Douglass - I like her experimental and fun approach to crafting, her sharing of tips and techniques and encouragement to mess about with the products.  And, then, of course there are her stamps!

Having just received one of her stamp plates, Lavender - this was what I came up with.....

Materials used:
8" x 4" Black card
CB folder D'vine Swirls
Scoreboard
Stamps: Lavender - Creative Express
Promarkers
Glue, Ribbon
Black  and Clear Embossing Power

I started  by debossing one edge of the card with the D'Vine Swirls, then finished the pattern with a few scoreboard lines.  On the other edge I stamped one of the images with a clear Ink-it-up pad and embossed with black powder. 
Next the stamped image  - coloured with Promarkers, and then triple embossed.

I wanted the mat to make the image stand out - so as well as mounting on 3D pads, I added an irregular amount of Prit stick glue to the edges of the mat and then black embossing powder. 


You can see the results you get with this method.  I also did this on the edge of the base card.
My finished card.....

Lavender Blue.....can you remember the rest of the lyrics?  I tell you tomorrow.

Messing about was fun - thanks Sheena!