Hi

Hi, Thanks for dropping by.

My name is Eileen but to friends in the card making world I'm known as 'ikki'. (which is pronounced I-KEY) From where or how this came about I'm not sure - it just got shorten from my original craft name of Ikemo by various friends along my crafting way! I started crafting whilst recouperating from an accident, and from my first attempts with peeloffs and paint - I was hooked! Now my passion is my BUG! and now BEADING!

In the Cupboard you will find ideas, news, tips and techniques to help you get more from this fab little machine. So come in - join the fun and Cuttle with me!


Thursday, 30 September 2010

Tippy Thursday - Crafts Too you embossing folders

Hi, We all use Embossing Folders with our machines no matter what the make, and they are a real asset to our crafting!  I have try most of  those available, and although the majority I have are Cuttlebug folders, they are not my favourite mainly because they are slightly smaller than our A6 card size; they can crease the cardstock for this reason; and I have only found one folder (Swiss Dots) on which the pattern can be matched up to make a larger embossed surface.  Perhaps the newer folders do?  If you have any info on this, please leave me a comment that I can pass on to other cuttlers.

If you are a regular visiter to the Cupboard you will know that I like to emboss straight onto my cardstock as well as using them for matting and layering.   What I want from a folder a creasefree result, no breaking of the surface fibres of the cardstock, a full size A6 folder with a repeating pattern.  I'm not fussy or hard to pleased, am I!  (lol)

I have just bought 4 new folders from my supplier, Liz.  They are new additions to the Crafts-Too-you range and after testing them - I'm impressed with them! 

All of the examples are embossed on coloured copy paper. Only a very small section of one folder (spots)where I embossed over the centre fold actually cut the paper - my mistake!  
All of the folders embossed with no creases, and the patterns on all are REPEATABLE!  If you click on the pictures you can see if you are able to spot where the join is!

                                                                     Folder:  Spots
Folder: Hearts

Love Hearts

Damask

From my experiments I have found:
1: All of the patterns deboss as well as emboss
2: On very thin copy paper the folders do not crease or break the fibres, on heavy cardstock the embossing is good.  
3: All of the folders have repeated patterns - I have embossed onto a 6" square paper
4: The Heart folder opens the opposite way ie from the top
5: The folders emboss a full A6

Tips: If embossing a larger square card, start with the folder at the edge and emboss towards the centre fold.
Place the top B plate slightly over the folder so that you don't get a line from the folder.  On the next run, reposition the folder by overlapping  the already embossed pattern.  Feed the back of the card through first,  this time the B plate is best placed well over the pattern already embossed, that way you will not get a pressure line from the folder.  (This has been difficult to explain - not sure if I have it clear!)


Wednesday, 29 September 2010

A few queries and answers

Hi, life continues to be hectic, but Dave's health has improved considerably and my thanks to all who have left messages of support and caring this last week. 

I have received a number of questions and thought that I would answer them this way since it might also be helpful to others.

Max asked:  If the words on my Bird  card  with the fanned lines were printed on the PC or stamped.

The words were printed on the PC, I have found that even on hammer card this works well.  The font I used is called "Pristina"  I also used the font "John Hardy" (size 20) on the card with the 2 birds.  I will try to remember to include  details of the font on future cards.

Nessie replied to my "Little Boxes" with another clever idea....

Ikki, I know these boxes for ages. May I give you another tip? If you have a square shop-bought card that you like a lot, you can cut that in half and fold the box from the 2 pieces. The card front will be the lid, the card back is the bottom, you just have to make the bottom square a tiny bit smaller. If you have perhaps "Happy Birthday" in your card, it will appear inside the box after folding. Very nice as a wrapper for costume jewellery, etc. If you do not like the picture on the card, you can cover it up with paper of your choice or a 3-D flower, etc. But even then you have quite a sturdy firm box. Last year I made lots of small boxes from Christmas cards, added numbers on the lid and used it as an advent calender to send to my friend, filled with chocolate and other small treats.Hope you like my idea?
Thanks Nessie, for your suggestion, what a nice idea, and one to try!

Shoshi also left another tip on the Little Boxes..... " Love this box. I've made them in the past too - good tips, Nessie! I made them as part of my Christmas table decoration once, with an initial for each person in gold on the lid, and a choccie in each box!"
Thanks Shoshi for another super idea for that extra little touch to decorate your Christmas dinner table.

Paula asked:  Any new folders or dies? and, I forgotten the name of your supplier?.......
Yes, Paula I have just got the Wonky Squares and 4 new embossing folders, I'm working with them now and will show you the patterns tomorrow.  By the way the my lady supplier's name is ...  Liz.... Make a Lasting Impression, and funnily enough she does achieve this!

Right off to do some housework, I'm having to learn about recycling and a few other jobs seem to be piling up behind me!! but I will find time to show you my new patterns tomorrow. 

Hope your day goes well, and if you are dropping by from WOYWW, a big "HELLO" hope to join you soon!


Monday, 27 September 2010

Little Boxes

Hi everyone, Thank you for all for your conforting and encouraging messages, and I know that I have some replies to make, and will get back to you soonest.    I have been missing because Dave has been really poorly, but over the last two days he has started to improve, so fingers crossed the infection and his health are on the mend.  My own mojo has also took a big dip, but again fingers crossed!!!!

Today I'm posting a tutorial of the Trick and Treat boxes that so many of you were interesting in.....

So to start......you need a square piece of paper.  Any size will make a box, I have used a 6" x 6".

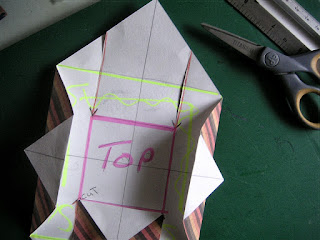
with a ruler, draw 2 lines corner to corner - fold all 4 corners into the centre

unfold - then refold again as shown taking the corner to the crease line of the first fold


You can now decorate the sides of the box

 
Now you need to cut 4 lines using the creases for a guide 

nearly there.....


now another 4 folds as shown taking the corners back on themselves - you could do this before you make the cuts.

 With the next step you will feel you need more hands.....
you could use a paper clip
 
one side done....
now  fold the flap over.....to secure


Your box!    HOPE YOU'RE STILL WITH ME?  You now have the lid of the box.
To complete the base - your square of paper needs to be trimmed by 3/8" inch on two sides only to make it slightly smaller, then folded in exactly the same way.

The first one is always the difficult one! 
The secret is to make sure your creases are crisp mand fold accurate.

Hope you'll have a go and if the instructions are confusing....SHOUT! 


Tuesday, 21 September 2010

Nestabilitie Squares and Scoreboard - Fanned lines

Hi, Dave has not been well since late of Sunday evening, to the extent that he came very close yesterday to being re-admitted to hospital. Thankfully, the situation improved and now we are just taking a day at a time and hoping that the worst is over.

Since he is in bed resting and I needed to unwind, I thought I'd pop back to show you this "Just to say" card  I made recently:  a card for any occasion....

Materials used:  6" x 4" white hammer card
 Image:    Inkadinkado Butterflies and Birds - triple embossed
Nestabilities: Small Squares
Scoreboard: Eaziscore

To achieve this fanned line effect - use the 2 lines as shown.  Do the first line corner to corner, then keeping the bottom corner on the first grove line, move the card to the second line and score again, and so on until you have your desired lines one way, then reverse to complete the design. 

A simple but effective card that you could use for any occasion - today, if I were to write inside it would say "A Big Thank You to you all" for your positive and caring messages. 

Sunday, 19 September 2010

He's back home!

It been a painful, emotional and tiring few days, but happy to say Dave has been discharged from hospital today. The journey home was, despite my driving, less painful and bumpy - why Dave wants to know do ambulances have no shock absorbers?

The surgeon has been amazed at his recovery, the op was a bad one and the appendix he said had turned gandrous - what a relief they removed it when they did! Still that's done with and with lots of TLC he should soon be feeling better. He has already commandeered my laptop to watch the football in bed, but I don't think he'll want any of my crafting bit and pieces so I should be back very soon with another project. My little boxes are still sitting there waiting for me, but first I need a good nights sleep. Many thanks for all your caring messages, words can in no way convey my feelings for you all!

Friday, 17 September 2010

latest news

Thanks everyone, your support has been so welcome and comforting. The staff nurse has just rung and the good news is that the op is over; appendix gone and the patient is back in his bed and asleep. He has not quite made the record books for the oldest patient to have his appendix removed, but he very near the top of the list! Even at the CT scan he was asked what he was there for, and asked again are you sure! Thanks so much for being around, I would have felt very lonely without you, that for sure!

Update

Well, so much for plans, even my post didn't post!  Again Sorry, not been a good day all round.  I rushed of to the hospital at lunch time thinking I had set things up, but alas not as clever as I thought I was!

I'm sitting here still on pins, I'm waiting for news that Dave has had his op to remove his apprendix which apparently has now burst!   He is very tired with all the drugs they are pumping into him and he has a fever.
They told me he would be taken to theatre early evening, so I'm hoping it won't be long before I hear he is okay.  How true is the saying "when you're busy time flies, when you're waiting is drags!"

Hope someone was lucky, if not watch this space because shortly I'll be organizing a little candy of my own to celebrate reaching my 600th follower today.  Thanks to you all for your support and for your messages, which touched me that you cared.

Halloween - Take 5

Well Halloween - Take 5 planned but plans had to change as Dave was rushed into hospital Thursday lunch time with a suspected appendititus.  Crafting was left unfinished, so my apologies for not finishing off the blog hop with my trick and treat boxes as intended, but I know you will understand.

I was planning to open one of my boxes to reveal......yes.....wait for it..... mine held the TRICK!!!!  But, the TREAT is still out there.  If you didn't spot them on your visits, now if you pop round again all the TRICKS WILL BE REVEALED by 2.00PM today - SO YOU STILL HAVE TIME TO ENTER FOR THE DRAW.  AND, not forget to leave a comment on the EDIT blog, who knows?!?!?!

The Cupboard bog hop will have to be completed....don't know when....but soon. 

Thanks for understanding - I'm in a bit of  a spin at the moment!  Think Dave will be having an op this afternoon. 

I'll check back later to see who the winners were, good luck!

Just a quick word

Very quick post - bit of an emergency happened yesterday - I'll post again at 2pm on  Halloween Take 5 and let you know more about it then.

 Sorry to disappoint you,  but I know you'll understand!

Thursday, 16 September 2010

halloween - Take 4

Hi, thank you all for your lovely comments yesterday, and just to let you know that I'm working on a tutorial for making my trick or treat boxes.  In the meantime I thought you might like a look at this really spooky card.......

this is the stamp plate I used - it's called SPOOKYLICIOUS!!!!!!

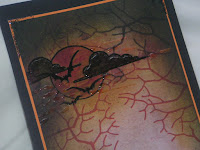
The raven and verse were stamped with a clear Perfect Medium inkpad, and embossed with a fine black embossing powder.  The background paper from the Artylicious CD Essense of Nature and distress inks added a bit more colour. I punched the leaf shape out of the paper to show the black of the base card.

Promarkers and glossy accents helped give dimension to the moon and clouds and
my finished card - really enjoyed making this one.

One day to go before the winners are drawn, hope you find the candy...did I say where to look?
  No, well pop over the the EIDT blog - even if you don't find the candy there are lots of cards and ideas on show.

"When black cats prowl and pumpkins glea
May luck be yours on Halloween."

See you tomorrow, enjoy your day
ikki

Wednesday, 15 September 2010

Halloween - Take 3

Hi, welcome to my blog of this WOYWW morning. If you have not heard of Julia and her group of exposing crafters, pop over to see her from the link on my sidebar.  Today is also my third Halloween  post this week, again if you've not heard of the Elusive Image Design Team  Blog Hop - why not bat over there and join us - there's candy about!

Today I'm making Halloween gift boxes and on my desk......
are some of the bit and pieces that I had left over from various projects and decided must do something with!
In the background,  are a few more spooky things that will fly in over the next two days. Friday is the day when the winners will be drawn. 

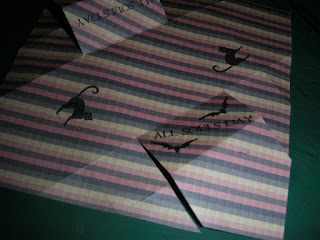
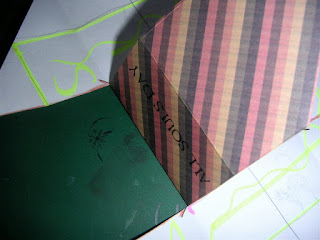
Here are my boxes that I'm going to fill with tricks and treats for my grandchildren - I thought if I made a few (and they are easy) it would make a great suspense game - have you chosen a treat or a trick?  Ooohhhh, what's inside????
 
These little boxes are made from a square of 6" x 6" paper.
Would you like me to do a project showing you how to fold them?

Back to the Blog Hop and the candy - as Lin said

Eye of newt and ear of bat
put my name in the lucky hat

You will find my Halloween teamies lurking over at the EIDT blog waiting to welcome you! Why not come over, make them jump with a big BOO and put your name in the hat.....

Tuesday, 14 September 2010

More Halloween.....Can't stop

I've been playing with my Halloween stamps again and although it's a dark, grey, wet morning, I feel relaxed and happy having enjoyed being creative with these creatable stamps. 

This is the stamp set I used

I took the spooky house and with a clear embossing pad stamped the image onto my charcoal glimmer card, then added black embossing powder and heated.
  The windows and cobweb are highlighted with a glitter pen - spooky hey!

 I created a tag to make a ledge for the large
scary cat to stand on.
 He seems to be saying something like "watch out - something's about!"
  
My finished spooky card - bats and all!

Thanks for all your lovely comments yesterday, and a warm halloween welcome to those of you who have joined the Cupboard followers.  Hope you all enjoyed visiting the EIDT blog and my Design Teamies.  Wonder where that candy this!?!?!?  Did you find it?  If not, it's still lurking out there, may be under a toadstool!  Why not pop over there -  today you'll find even more Halloween inspiration. 

On my WOYWW desk tomorrow I'll have another project to show you.
Have a great ghouly day!


Monday, 13 September 2010

Elusive Images and Halloween Stamps

Halloween!  Time for some fun crafting! 

I have to say that I have never made any Halloween cards before, but when presented with the stamps from Elusive Images celebrating this time of year, I was hooked!  What fun - soooo creative - they allow your imagination to soar with the bats, grow with the  pumpkins, candles light your way through the cobwebs to the spooky houses and much more..... you can check out the designs available from this Elusive Images link.

The Design Team has been busy making cards and today we have a blog hop for you.  Why not join us and see our work and on the way you may find some candy ?  Feeling interested; feeling lucky - pop over to the Elusive Team Blog (link on my side bar) you will see all the DT blogs listed for easy assess.

This is the card that I made for the Blog Hop - it's not my spookiest, but I thought this would look good in the Cupboard as although it's a halloween theme, the layout is adaptable to other occasions and the techniques useful to you.

Materials used:
A4 Black linen and Bronze pearlised cardstock
Stamps: Elusive Images
Nestabilities: Squares Classic Large and Big Scalloped Large
Marianne Creatables : Swirls
Inkpads: Black, Clear Perfect Medium
Bronze Embossing Powder
Glue
Scoreboard

Method:
Fold A4 card in half to make a landscape card - emboss 2 score lines along the top edge

Die cut:  2 Black  and 2 Bronze squares  (I used the 2"die)
Emboss the edges with an embossing pen  or tan mat.  ( I like this finished, but it is not necessary )

Make a frame from the 2 Bronze squares using a scalloped die - save the cut-outs
Make the same  frame from 1 on the Black squares - save the cut-out

Stamp the cut-outs black on bronze/bronze on black using clear Perfect Medium inkpad, cover with embossing powder and heat.

Fit the cut-outs into the appropriate squares.  Decide where you would like to position the squares, and add another 2 scores lines underneath.

On a rectangle piece of card, stamp the sentiment with clear Perfect Medium inkpad, over with embossing powder and heat. 
On the edges of the rectangle - with a prit stick glue (or similiar)  run round the edges in a thick  irregular pattern, cover with brozne embossing powder and heat. 

Die cut swirls from the Bronze card and assemble on card with the sentiment tag. 

Hope you have a go a this, it sounds lengthy when reading the instructions, but it's a design that all can use whether you are a beginner or an advance crafter.  If you don't have the dies - you could use a punch.  I'd love to see your work,  if you leave me a comment I'll come over and visit. 

NOW, my Design Teamies have some great cards to show you and I wonder where that candy will be????? 
To be in with a chance to win, here's what you will need to do:
1. Become a follower of The Elusive Images Design Team Blog and all the DTmember blogs
2. Leave a comment on my blog and all the teamies blogs.

The winners will be chosen by Random Org at the close of the Blog Hop on Friday September 17th and the winner will be announced after 5.00 p.m.

Come and enjoy some ghouly fun with us! 
          

Sunday, 12 September 2010

More news ! Stamp offers and candy giveaways.

Hi, fancy winning some stamps?  Fancy doing a bit of blog hopping to see some fab  samples of ??????? some brilliant stamps?  If so, join me tomorrow and I'll point you to the fun!
Just a little sneek preview of the card I'll be demonstrating tomorrow - hope you'll be able to join me and the
Elusive Image Design Team members.  You could be in luck!


Friday, 10 September 2010

Crafts Too You - New embossing folders

Just had news of new embossing folders available from Crafts Too You.  Interesting!  If you would like a look at some of them - follow the link on my sidebar to Make a Lasting Impression.  The price of these A6 folders is £3.99 free UK P&P, contact seller for Worldwide charges.

Thursday, 9 September 2010

Oval Nestabilities - Information and Sizes

OVALS

Ovals are a little different than circles. For a start there are two sets of ovals:

Classic and Petite.

They not only have a different amount of scallops, they are also different in shape. The Petite shape with 37 edges is more oval shaped than the Classic that has 22 edges. You could describe them as the Classic Scallop being a rounded oval and the Petite being a longer narrower oval.

The Largest die in the Classic Ovals measures approx. 4" x 3.1/l6"
The Largest die in the Petite Ovals measures approx. 4.75" x 3.75"

Therefore, you need the right Standard Oval to fit the right Scallop Oval

Standard Classic Oval Large (S4 -110)
co-ordinates with Classis Oval Scallop Large (S4 -111)

Standard Classic Oval Small (S4-112)
co-ordinates with Classic Oval Scallop Small (S4-113)

Standard Petite Oval Large (S4-138)
co-ordinates with Petite Oval Scallop Large (S4-139)

Standard Petite Oval Small (S4-140)
co-ordinates with Petite Oval Scallop Small (S4-141)

------------

Deckled Edge Classic Oval - S4-259

A Nestabilities® set of five Ovals, all with edges resembling torn paper. The Deckled Edge Classic Ovals LG coordinate with the S4-110 Classic Ovals LG and S4-112 Classic Ovals SM for stacking and layering.
The difference between die template sizes within a Nestabilities set is ½", which becomes a ¼" border when layering. The difference between LG and SM Nestabilities sets is ¼".

Approximate Die Template Sizes:
1: 1⅛ x ¾"
2: 1¾ x 1¼"
3: 2⅜ x 1¾"
4: 3⅛ x 2⅜"
5: 3¾ x 2⅞
-------------------


Big Scalloped Ovals Large S4-251

This set of 5 Nestabilities® die templates features scalloped cutting and embossing edges in an Oval shape. Big Scalloped Ovals LG have 10 half circle curves along the outer edge of the Oval shape. Big Scalloped Ovals LG will bring a soft and delicate look to your oval art.


Big Scalloped Ovals LG stack and layer with the S4-112 Classic Ovals LG and S4-252 Big Scalloped Ovals SM die template sets.

The difference between die template sizes within a Nestabilities set is ½", which becomes a ¼" border when layering. The difference between LG and SM Nestabilities sets is ¼". Combining both the LG and SM sets of Nestabilities will allow for ⅛" borders when layering.

Approximate Die Template Sizes:
1: 1⅛ x ¾"
2: 1¾ x 1⅜"
3: 2½ x 1⅞"
4: 3¼ x 2½"
5: 4 x 3"
-------------

Big Scalloped Ovals Small - S4-252

This set of 5 Nestabilities® die templates features scalloped cutting and embossing edges in an Oval shape. Big Scalloped Ovals SM have 10 half circle curves along the outer edge of the Oval shape. Big Scalloped Ovals SM will bring a soft and delicate look to your oval art.

Big Scalloped Ovals SM stack and layer with the S4-114 Classic Ovals SM and S4-251 big Scalloped Ovals LG die template sets.
The difference between die template sizes within a Nestabilities set is ½", which becomes a ¼" border when layering. The difference between LG and SM Nestabilities sets is ¼". Combining both the LG and
SM sets of Nestabilities will allow for ⅛" borders when layering.
Approximate Die Template Sizes:
1: ¾ x ½"
2: 1½ x 1⅛"
3: 2⅛ x 1⅝"
4: 2¾ x 2⅛"
5: 3⅝ x 2⅝"
--------------------------

Beaded Ovals - S4-294

Designed to coordinate with Classic Ovals, these Decorative Elements Nestabilities® feature a scalloped edge filled with an embossed circle, or bead. The edge detail has even spaced embossed beads all the way around each die template in the four piece set. Beaded Ovals nest for making elegant frames. Cut/emboss and stencil onto the oval center or layer with Classic Ovals for versatility and elegance.

Approximate Die Template Sizes:
1: ⅞ x ¾"
2: 1⅜ X 1¾"
3: 2¼ x 2⅞"
4: 3⅜ x 4¼
------------------

Crown Ovals - S4-303

Coordinating with Classic Ovals, these Decorative Elements Nestabilities® feature embossed tip crown points that encircle each embossed circle to give a regal look. This four piece set nests for elegant frames, or can be used individually, with stamped images or embellishments in the center oval.


Approximate Die Template Sizes:
1: ¾ x ⅞"
2: 1½ x 1¾"
3: 2½ x 3⅛"
4: 4 x 4¾"
-----------------

Grand Ovals - LF-110

This set of Grand Ovals coordinates with the original Nestabilities® S4-110 Classic Ovals LG, and stack and layer with LF-111 Grand Scalloped Ovals.


Grand Nestabilities are designed for use in the Grand Calibur™ Die Cutting System. Spellbinders™ Grand Nestabilities cut, emboss and stencil perfect shapes that mix and match with original Nestabilities sizes. Larger shapes offer endless possibilities for scrapbooking, school projects, mini albums and more!

The difference between die template sizes within a Nestabilities set is ½”, which becomes a ¼” border when layering. The Grand Nestabilities increase in size from the original set, and maintain the same increments between die templates.

Estimated Shipping Date: October 2010
Approximate Die Template Sizes:
1: 3¼ x 4¼"
2: 3¾ x 5"
3: 4¼ x 5⅝"
4: 4¾ x 5⅞"
5: 5¼ x 6⅞"
6: 5¾ x 7½"
----------------------

Grand Scalloped Ovals - LF-111

This set of Grand Scalloped Ovals coordinates with the original Nestabilities® S4-111 Classic Scalloped Ovals, and stack and layer with LF-110 Grand Ovals.


Grand Nestabilities are designed for use in the Grand Calibur™ Die Cutting System. With Spellbinders Grand Nestabilities cut, emboss and stencil perfect shapes that mix and match with regular Nestabilities. Larger shapes offer endless possibilities for scrapbooking, school projects, mini albums and more!

The difference between die template sizes within a Nestabilities set is ½”, which becomes a ¼” border when layering. The Grand Nestabilities increase in size from the original set, and maintain the same increments between die templates.

Estimated Shipping Date: October 2010

Approximate Die Template Sizes:
1: 3⅝"
2: 4¼ x 5⅜"
3: 4¾ x 6⅛"
4: 5⅞ x 7½"
5: 5¼ x 6¾"
6: 6½ x 8¼"
--------------------------

The numbers of the sets are from the Spellbinder web site.

If you had both sets of Large and Small there would be 1/8" difference between the dies if the sets were layered inside each other.

If only one set the different between the dies would be 1/4"
 

Wednesday, 8 September 2010

WOYWW

Hi WOYWWer's, As you know my desk space is quite limited and I reached  a point yesterday where something had to move!  Sad to say, I didn't move that something quick enough and as a result my 2 bits and pieces boxes fell on my bit of space and then onto the floor!  All the scraps and labels, cut and never used, all my stamping experiments just thrown in the box lay scatter about me!!  Since I hadn't moved that something, something had to be done pronto!!!

I had to start by clearing up, then picking up, next after picking them up.... was looking through them, it was like finding old photographs....you have to stop, gaze and wonder all over again.  When did I do that? Why didn't I use it?  Can I use it now?

I ended up with dies, and odds and ends all over the place, and was still at a loss as what to do with them.
But, since I had been asked to make a few "Just to say" cards I followed this direction.  The cards needed to be useable for any occasion, including sympathy.....

This is one I made.  On looking at it again - I think I could have made two cards with one image on each.  How wonderful is hindsight! 

Hope to catch up with you soon on the WOYWW blog hop!


Monday, 6 September 2010

Nestabilities - Labels Small and Large - Change the shape!

Getting more mileage from my dies is a favourite pasttime of mine, and so here's another idea for you if you have the Labels Small and Large Rectangle dies.

                                                   
Yesterday I was playing about with this blue tag and Cosmic Shimmer Mists: Candy Pink and Angel Mist.   Having changed the colour and added a bit of shine, I used a Airondack Demin ink on stamps from Elusive Images and Rubber Stamped as a contrast.  I decided that the tag was too big, so I trimmed it down, but it was still not very inspiring.  After looking at several dies I was unable to find a die that fitted over the pattern, so.....

using one of the labels from the Rectangles Large and Small set,
 I taped the die across the top of the image and made a partial cut

then did the same to the other end

Again only cutting the edge.  Now using a ruler, trimmed the straight sides.

You will not be able to emboss this new shape with the tan mat, but.....
with a bit of patience you can do it with an embossing tool!
If you have not seen this post....check out the method  here.

Using another of the larger dies I have cut a mat slightly larger than my image in exactly the same way.

so I now have a new longer shape made from two much smaller dies.
I have not quite finished my card and will have to show you another time, but for now I have to abandon my craft desk for another matter.  Shame, I was enjoying myself, still it will be nice to have something to come back to!