There are times when you have such a pretty paper or strong coloured cardstock that all you need is a fancy tag or label to complete your card. That is how this project came about.
For the tag:
Two pieces of coloured card
Two different sizes of plain oval dies
Two different sizes of scalloped oval dies
Acetate
Stamp
Using the smallest plain oval, cut, emboss and stamp sentiment.
Using the largest scalloped oval, cut and emboss
Using the largest plain oval, with the smallest scallop oval, cut a frame
With the same plain oval cut a piece of acetate
Assembled and with a bit of ribbon, you get this effect. Posh Tag!
Now I need a card for the tag:
Largest Curved Rectangle Nestabilitie Die
CB folder Swiss Dots
Flowers, ribbon, gems
Stamp
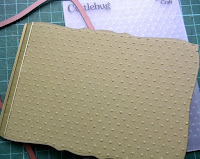
Placing the die just over the centre fold line, cut the card. If you use a heavy quality cardstock you may have probs cutting. If so, run through the bug twice, and you could also try turning the partially cut die slightly to cut on a different angle. (hope this makes sense!)
Add two different ribbons to the edge and knot on the inside.
My finished card and tag.
My next post will be on Thursday, lst October.
Thanks for dropping by, hope you have a good week.
Hi
Hi, Thanks for dropping by.
My name is Eileen but to friends in the card making world I'm known as 'ikki'. (which is pronounced I-KEY) From where or how this came about I'm not sure - it just got shorten from my original craft name of Ikemo by various friends along my crafting way! I started crafting whilst recouperating from an accident, and from my first attempts with peeloffs and paint - I was hooked! Now my passion is my BUG! and now BEADING!
In the Cupboard you will find ideas, news, tips and techniques to help you get more from this fab little machine. So come in - join the fun and Cuttle with me!
Pages
Monday, 28 September 2009
Thursday, 24 September 2009
Tippy Thursday - Glass cutting mats
I was recently watching C & C and they were talking (and selling) glass cutting mats. The reason for buying one was that cutting was so much easier.
My cutting mat is getting a bit the worse for wear and I considered getting one of these mats, but they were a bit on the expensive side! Then I thought, I have a glass cutting mat in the kitchen - what's the difference!?!?!??!? The answer nothing! I was lucky that my local Aldi was selling a set of two mats that week for £4, so guess what jumped into my shopping basket - yes you're right I now have a glass cutting mat on my desk. Obviously, my mat does not have any cutting lines, so I taped my old mat down with masking tape and put the glass mat on top - result I now have lines I can use to aid lining up. The claim that cutters, knives, etc., move more easily is true, I have also found that when embossing with my pen, you can swivel the die round instead of trying to twist your hand under your arm! On the downside, most of these kitchen glass tops come with etched patterns, so if you consider getting one you need the less patterned one you can get. Mine has a little square pattern, and it's actually quite useful for lining up. Good buy. Thanks C & C for the idea.
My next post will be on Monday, 28th September. Hope you'll join me.
Monday, 21 September 2009
Spellbinders Nestabilities and Shapeabilities - Christmas
Christmas and Spellbinders - what a great combination for crafters! I recently got the New Shapeabilities Create a Flake 1 die cuts and boy oh boy am I pleased with them. They have given me so many new ideas and were just what I needed to make me get off my butt and do something.....
This is the first of my Christmas cards done on the Bug.
I used:
CB Winter Scene
Nesties - Plain and Scalloped Oval
2 Snowflake Shapeabilitie Dies
Basic Grey Paper
6 x 6 White Linen Card
White and Siliver Card
White and Red Ribbon, snowman embellishment, tag
and of course Glitter
First task is to cover your front card with your choice of paper.
I particularly love the Basic Grey Wassail Range - it seems to be modern and yet traditional at the same time!
Cut a scalloped oval - you could emboss this, or as I found when using a heavy weight silver mirror board the embossing did itself!
Cut a plain oval and emboss the edge with either your tan mat or an embossing pen.
Emboss the plain oval with the CB winter scene folder and
add some Sparkles or glitter on the roofs and foreground.
I also added a snowman.
There are five shapes of snowflakes in the pack - I used two and
embossed them using a tan mat.The dies are far to intricate to use the embossing pen. You definitely need a TAN mat.
To finish the card I have added White and Red ribbon, with a bow and tag.
I really enjoyed making this card, and I have a feeling that these snowflakes will be appearing again, and again before the big day!
To illustrate the flakes, I have cut out all five dies, using two layers of paper. This went through the Bug no prob. You will see that you get a lot of flakes this way.
Using two colours you can get some interesting combinations. Unfortunately my camera didn't hold still (!)for the closeup shots, but I think you will be able to see the embossing.
Happy Cuttling,
Labels:
Christmas,
Create a flake,
Cuttlebug Folders,
Nestabilities,
Ovals,
Shapeabilites,
Tutorial
Thursday, 17 September 2009
Tippy Thursday - Overlaying images on frames
I have been really touched this week to have received even more messages of support and encouragement to continue with the Cupboard. When I started this blog back in January I had no idea that it would become so popular, or so needed by so many! I loved my Bug then and I still do, and now I also have you! So to all my blogging friends and followers a big thank you for being there when I needed you most. To all the new followers that have joined me this week - a very warm welcome - I hope you will enjoy and find interesting things here, but you may have to look at the back of the Cupboard because the shelves are getting pretty full - the labels will help you. Now, let's see where the Bug will take us.....?????
I have found fanastic tip for you this week and tutorials to boot! This is so clever! The original idea comes from Katharina. Katharina calls it "overlaying images on frames". You will also find other super crafting on this "out of bounds images with the nestability shapes" at Rachel's. These two ladies are very talented. Rachel also demonstrates using Copics...you really must pop over to these two great blogs.
That's all folks, because I know you will now be busy blog hopping.
Cuttlehugs to all,
Monday, 14 September 2009
Carry on Cupboard
Well, what can I say but thanks to all for your comments - I certainly got the message that you want me to continue!
I found in reading your posts that many of you voiced what was in my head, and these were questions that I needed to find an answer too. To those of you who asked if my dilemma was over family issues or health, then No this was not the reason for my uncertainty. "Sharing with the world" is also not a problem for me because sharing crafting ideas and skills is a pastime I enjoy. If you find my work an inspiration, I have no problem in you using the ideas in your own crafting, only that you do not enter the work as your own in any form of publication or challenge, and I would also add that if possible you link back to my blog so any new owners of the Bug can also find and share this information. So, my dilemma comes down then to TIME! At the moment, blogging is conflicting with my other hobbies and life in general, and I have fallen into the trap of routine and pressurized myself. My hobby has become a job! The pressure to find new ideas has actually brought my cuttling craft to a halt - mojo gone! Enjoyment restricted!
I have, however, decide that I do want to continue, but I have to change something. So I hope you will bear with me until my head and cuttling returns. I will be posting tutorials and tips, but for the immediate future I cannot guarantee that I will be able to do so on specific days (Monday and Thursday). If you are a regular visitor and blog owner, why not become a follower and this way you will know when I post. My head is full of ideas, but somehow I cannot sort them out and get on with them, NUT when I do, I would like to share them with you. AND, Christmas is coming and I have just received some Christmas Spellbinder Dies from my supplier that are just brill! So watch this space!!!!
Just a note to my many followers who are not blog owners and are unsure of how to leave comments. Knowing how to do this is a useful aid, so .... all you need to do is to look at the bottom of this post for the word "comment". Click and it will take you to another page where you can write your message or question. Below the comments box you will see various options to select - click annoymous and then post. You will not see the message immediately. There will be a note at the top of the page saying "waiting owners approval" (this is a way of preventing scam mails), when I receive the message I will post it. Hope this helps - why not try it now - you will not do any harm and when you have succeeded you will be more confident and do it again, and again. I hope!!!
I thought today I would show you these two cards which I made awhile ago. Christening and Naming day cards can give you a headache trying to find something appropriate. These are simple, but effective cards using the CB Swiss Dots folder embossed straight on to the card. This folder is particularly useful because you can emboss from the top, turn it and do it from the bottom, or sideways which is the way this is done. Then with a scoreboard you can add a couple to lines below the embossing to give a crisp, professional finish . The sentiment was done on the PC before the embossing, and the images are clipart just matted and layered. A double silver cord with the bow tied inside completed the cards. I have my blogging mate Barbara to thank for the first one - she used this image for a Mother's Day card - it was beautiful. I like the grey image the best, but both look good. What do you think?
Be back soon.....
Thursday, 10 September 2009
News of Spellbinder Christmas Shapeability Dies
Hi Cuttlers, Just thought I'd inform you that my supplier has some of the new Christmas dies and also many of the new pendant and border dies now in stock. You will find a quick link on the side bar.
Many thanks to all who contacted me following my last post - I'm seriously thinking about your comments.
Tuesday, 8 September 2009
Should I or not?
I have a dilemma! Should I continue with this blog, or not? The fact that I have had over 65,000 visitors in 6 1/2 months tells me that crafters do visit the Cupboard, but do they make just one visit, or frequently return - I don't know! Do they find the tutorials interesting - well yes a few do - they have told me, but for the vast majority!?!??! I don't know! Can I continue? Well, yes I could, but perhaps with changes. However, should I continue is another question? What do you think? What would you like to see happen? Can you help me decide? As I said before "I have a dilemma!"
Thursday, 3 September 2009
Tippy Thursday - Birthsigns
Hi everyone, My tip this week is based mainly on myself! Why, you may ask? Well, tomorrow is my birthday and I had this thought that if I was ever stuck with "what to do" for someone's birthday, I could use their birth sign as a guide! So, I started to do some research on the web and came up with some interesting and also amusing facts.
I discovered that:
"The Virgo motto could be "Perfect is almost good enough." On one hand, this trait makes you very employable, for you're not likely to do shabby work. On the other hand, you can be so finicky that you put limitations on your interactions and experiences before they happen. You'll be happier if you can learn to be selectively less critical, both of others and yourself." (I have to admit there is a lot of truth in this).
Virgo Greatest Strength: Your ability to focus your attention (with me mostly, but not always my head can wander off at times)
Virgo Possible Weakness: Need for perfection gets in the way of enjoyment (this trait is a bit annoying!)
Virgo's Lucky Number:
The lucky number for Virgo is five (also known as the Pentad).
Virgo Birthstone
Sapphire is the birthstone and also the gemstone given for anniversaries of the 5th and 45th years of marriage. (This took me by surprise - what a coincidence - my birthday gift from Dave is to be a ring, and we are celebrating our 45th wedding anniversary later this month!).
Virgo Compatability
In general, if people are typical of their zodiac sign, relationships between Virgo and other signs (including the complementary opposite sign, Pisces) are as shown below.
No one told me this 45 years ago - but luckily Dave is Taurus - is there really some truth in this?
Virgo Snacks
"You won't find health-conscious Virgo tearing through a huge plate of nachos. This sign prefers a snack that is both wholesome and filling. Soy nuts are just the ticket for a hungry Virgin. Choose the kind with no artificial flavoring and preservatives, please. This sign treats their body like a temple, even when it comes to snacks!( from http://horoscopes.aol.com/)"
(Definiently not so - I just love a cream cake for a snack, so no truth here, or do you disagree?)
Virgo Birth Flower is the Aster also called starwort.
The meaning of the Aster flower is Love, Faith, Wisdom and symbolizes Valor
Lucky Numbers:5, 14, 23, 32, 41, 50 (might try this on the lottery this week)
Lucky Colours:Orange, White, Grey, Yellow, Mushroom (some say Green as well)
Lucky Stone : Topaz
Lucky Talisman:The Key, The Owl, The Tau, The bamboo and serpent
So if you were sending me a card or GIFT (joking but, if you like) could you use any of this info? We have Asters in the garden - so I could get a bunch of them perhaps wrapped with a Orange,white,yellow, mushroom(!) bow. The ring is a defo - but what - a sapphire or a topaz stone, I was thinking of a diamond myself! I would also love a cream cake, definitely not the nachos or a soya nut, but then I'm suppose to be on a diet so perhaps I should?
So birth signs could give you some ideas for using flowers, colours, charms on cards, but for the rest, although interesting reading, little use in crafting. However, the characteristics were certainly revealing and I'm defo a Virgo - have you looked up your sign, and more importantly did you find any truth there?
I have another tutorial lined up for Monday, but I'm struggling to get it spot on! (lol) I'm certainly one fusspot Virgo!!!
I discovered that:
"The Virgo motto could be "Perfect is almost good enough." On one hand, this trait makes you very employable, for you're not likely to do shabby work. On the other hand, you can be so finicky that you put limitations on your interactions and experiences before they happen. You'll be happier if you can learn to be selectively less critical, both of others and yourself." (I have to admit there is a lot of truth in this).
Virgo Greatest Strength: Your ability to focus your attention (with me mostly, but not always my head can wander off at times)
Virgo Possible Weakness: Need for perfection gets in the way of enjoyment (this trait is a bit annoying!)
Virgo's Lucky Number:
The lucky number for Virgo is five (also known as the Pentad).
Virgo Birthstone
Sapphire is the birthstone and also the gemstone given for anniversaries of the 5th and 45th years of marriage. (This took me by surprise - what a coincidence - my birthday gift from Dave is to be a ring, and we are celebrating our 45th wedding anniversary later this month!).
Virgo Compatability
In general, if people are typical of their zodiac sign, relationships between Virgo and other signs (including the complementary opposite sign, Pisces) are as shown below.
Virgo with Virgo: | Harmonious |
Virgo with Libra: | Harmonious |
Virgo with Scorpio: | Harmonious |
Virgo with Sagittarius: | Difficult |
Virgo with Capricorn: | Harmonious |
Virgo with Aquarius: | Turbulent |
Virgo with Pisces: | Difficult |
Virgo with Aries: | Turbulent |
Virgo with Taurus: | Harmonious |
Virgo with Gemini: | Difficult |
Virgo with Cancer: | Harmonious |
Virgo with Leo: | Harmonious |
No one told me this 45 years ago - but luckily Dave is Taurus - is there really some truth in this?
Virgo Snacks
"You won't find health-conscious Virgo tearing through a huge plate of nachos. This sign prefers a snack that is both wholesome and filling. Soy nuts are just the ticket for a hungry Virgin. Choose the kind with no artificial flavoring and preservatives, please. This sign treats their body like a temple, even when it comes to snacks!( from http://horoscopes.aol.com/)"
(Definiently not so - I just love a cream cake for a snack, so no truth here, or do you disagree?)
Virgo Birth Flower is the Aster also called starwort.
The meaning of the Aster flower is Love, Faith, Wisdom and symbolizes Valor
Lucky Numbers:5, 14, 23, 32, 41, 50 (might try this on the lottery this week)
Lucky Colours:Orange, White, Grey, Yellow, Mushroom (some say Green as well)
Lucky Stone : Topaz
Lucky Talisman:The Key, The Owl, The Tau, The bamboo and serpent
So if you were sending me a card or GIFT (joking but, if you like) could you use any of this info? We have Asters in the garden - so I could get a bunch of them perhaps wrapped with a Orange,white,yellow, mushroom(!) bow. The ring is a defo - but what - a sapphire or a topaz stone, I was thinking of a diamond myself! I would also love a cream cake, definitely not the nachos or a soya nut, but then I'm suppose to be on a diet so perhaps I should?
So birth signs could give you some ideas for using flowers, colours, charms on cards, but for the rest, although interesting reading, little use in crafting. However, the characteristics were certainly revealing and I'm defo a Virgo - have you looked up your sign, and more importantly did you find any truth there?
I have another tutorial lined up for Monday, but I'm struggling to get it spot on! (lol) I'm certainly one fusspot Virgo!!!
Subscribe to:
Posts (Atom)