For the tag:

Two pieces of coloured card
Two different sizes of plain oval dies
Two different sizes of scalloped oval dies
Acetate
Stamp
 Using the smallest plain oval, cut, emboss and stamp sentiment.
Using the largest scalloped oval, cut and emboss

Using the largest plain oval, with the smallest scallop oval, cut a frame

With the same plain oval cut a piece of acetate

Assembled and with a bit of ribbon, you get this effect. Posh Tag!

Now I need a card for the tag:
Largest Curved Rectangle Nestabilitie Die
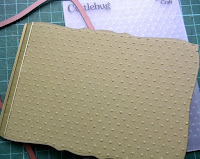
CB folder Swiss Dots
Flowers, ribbon, gems
Stamp
 Placing the die just over the centre fold line, cut the card. If you use a heavy quality cardstock you may have probs cutting. If so, run through the bug twice, and you could also try turning the partially cut die slightly to cut on a different angle. (hope this makes sense!)
Add two different ribbons to the edge and knot on the inside.

My finished card and tag.

My next post will be on Thursday, lst October.
 Thanks for dropping by, hope you have a good week.

11 comments:
Beautiful Eileen - just up my street with those fabulous colours. I shall certainly be trying this one out and I'm thinking Christmas cards !!!
hugs Heather xx
Hope you're having a fab holiday and don't forget - I'm going next time if you're gonna be seasick again lol.
That's lovely - needs nothing else. Thanks for an excellent tutorial!
very nice
greating Renate
That's really lovely. Simple, but so effective.
Great Tutorial Ikki.
I was talking about you yesterday to another follower. We both think your fab.
Louise Score DC
hi ikki, thats a fab idea thanks for that
hugs sylvie x
Oh I like that idea, thanks for the inspiration.
Hugs
Sarah
Hi Eileen, fab idea and fab tutorial, as always. Love this idea and a lovely card, hope you are well.
Barbaraxx
Gorgeous card, I love how you did the sentiment - thanks for sharing. Kim
Beautiful in its simplicity. Great card yet again!
Chrissie
What a lovely project!
Luv Jane XX
Post a Comment